

Configuration#
Use the Configuration menu to manage the main settings and behavior of the app.
Note
The User Interface display may differ between tablet and phone.
Manage Data and Products#
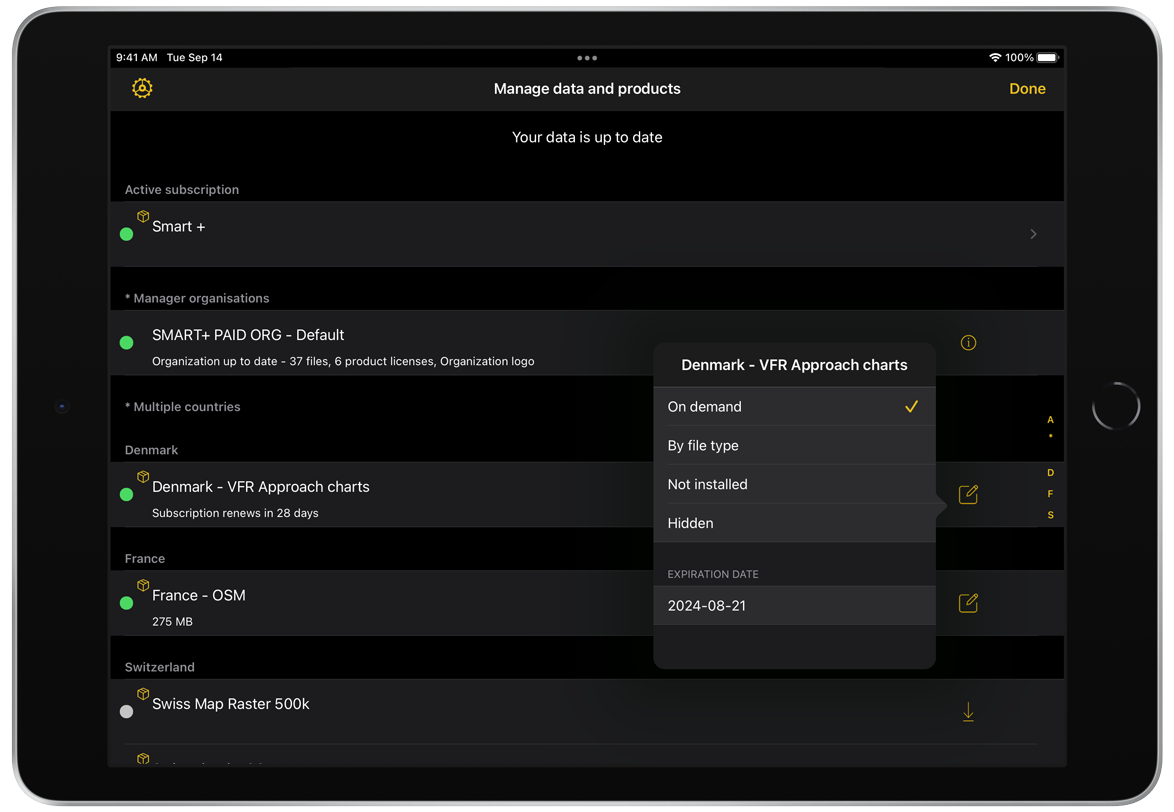
Use this page to review and manage all your products and data.
At the top of the list, you will find a folder containing all products included in your subscription. These are marked with a ![]() icon.
icon.
Below, additional products are listed alphabetically by country. Products covering multiple countries are grouped under Multiple Countries at the top of the list.
Depending on the product, you can install, update, uninstall, or hide it. The status is indicated by color-coded dots:
Gray: Not installed
Green: Installed and up to date
Orange: Installed but requires an update
Red: Expired or no longer available
Some products are not installed by default due to their size. Use the icons (![]() /
/ ![]() /
/ ![]() ) on the right to change the product status:
) on the right to change the product status:
Installed: Install the product on your device
Not installed: Remove the product from your device
Hidden: Hide unused or expired products
To show hidden products, tap ![]() and enable Show Hidden Products.
and enable Show Hidden Products.
Additionally, approach charts include the following options:
On demand: Download only charts relevant to your route when exiting Edit Mode
By file type: Install VFR, IFR, or both chart types
Note
Products provided by your organization can be configured for automatic installation through Air Navigation Manager settings. The status is applied after synchronization. See the Air Navigation Manager User Manual.
When you open Manage Data and Products, the app automatically checks for updates. It displays either Your data is up to date or Update data.
Tap Update data to install available updates.
Hint
Enable automatic updates when connected to Wi-Fi via ![]() .
.
Note
Your organization can also enforce automatic updates through Air Navigation Manager. See the Air Navigation Manager User Manual.
If a purchased product is missing, tap Restore Purchases. Restarting the app may also resolve the issue.
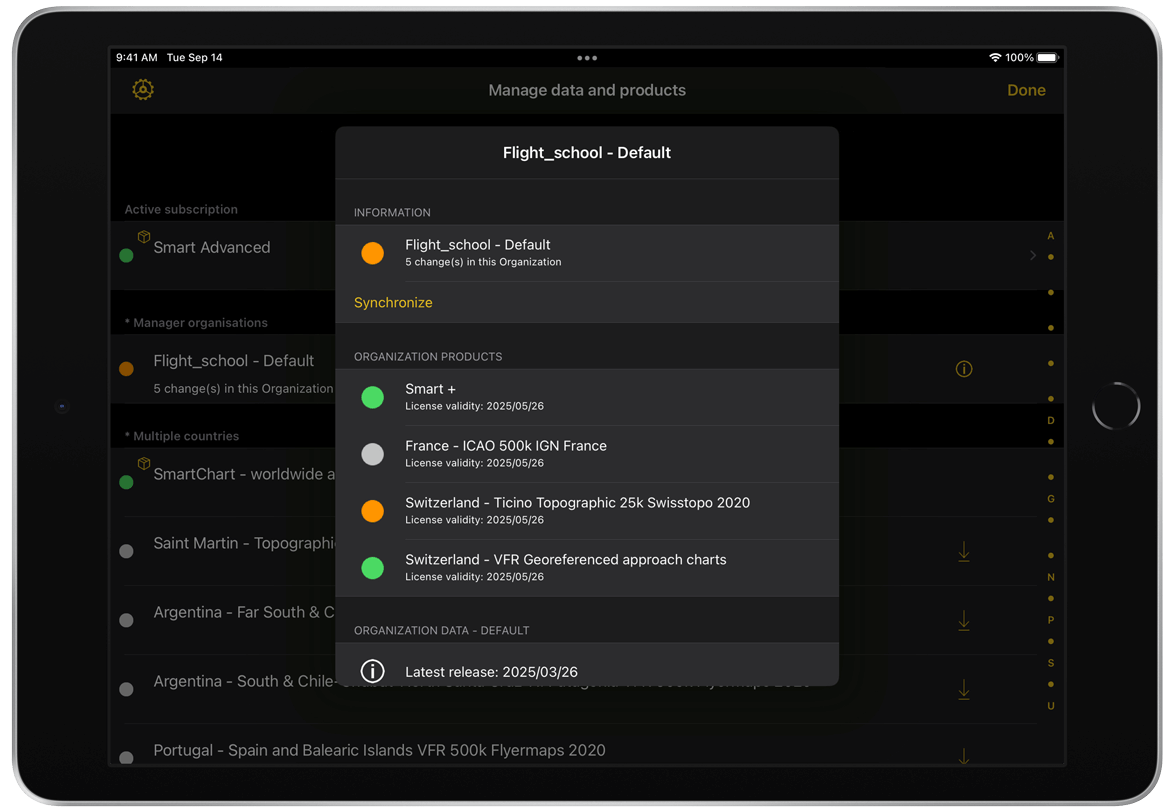
Air Navigation Manager Organization#
Under Manager organisations, you can manage your connected organizations.
Status indicators:
Green: Up to date
Orange: Updates available
To update:
Tap the organization
Select Synchronize or Uninstall
Alternatively, tap ![]() to:
to:
View product and data details
Check status
Tap Synchronize
Product status in this view:
Green: Installed
Orange: Auto-install product not installed or partially installed
Gray: Not an auto-install product
Note
Data is only displayed on the Moving Map if the organization is selected under Configuration > Air Navigation Manager.
Store#
Use the Store to access charts, maps, and aviation data.
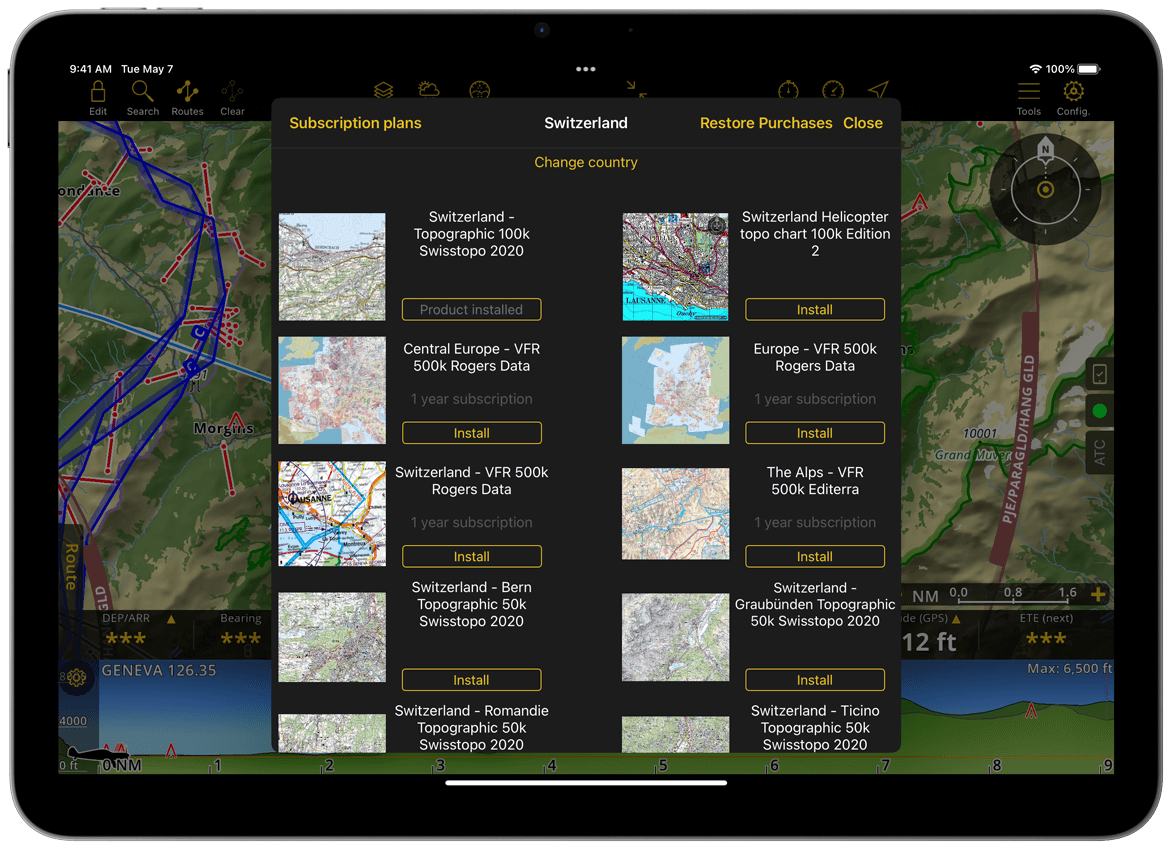
Note
Products without prices are included in your subscription. During the first 14 days, some paid add-ons are available for trial.
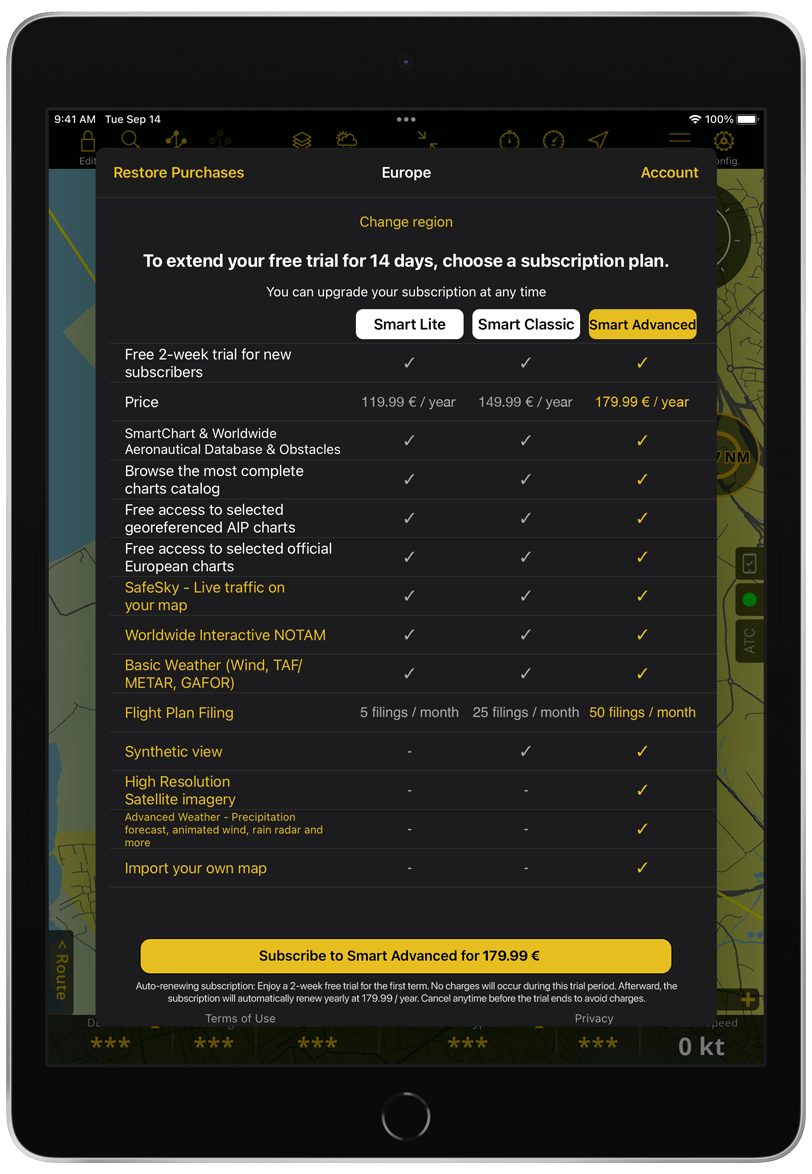
To manage your subscription, tap Subscription plans.
Account#
An Air Navigation account allows you to:
Synchronize routes across devices
Synchronize products across platforms
File ATC Flight Plans
Track and share flights
You can sign in using:
Email
Apple, Google, or Facebook
You can also create an account in the app or via the website.
Device name & model#
After signing in, you can view your current device name and model in the Account panel.
Note
The displayed device name corresponds to the active device.
Link a Device using a QR Code#
Use a QR code to sign in on another device.
On your current device, go to Configuration > Account
Tap Link a Device
Allow camera access
On the new device, open Configuration > Account
Scan the QR code
Wait for confirmation
Note
On Android, additional installation steps may occur.
Important
You can use up to three devices with your account.
Language#
Tap to change the app language.
Note
Restart the app to apply changes.
Instrument#
Select which Instrument is displayed when resizing the screen.
Sensors#
Use this menu to configure Sensors / External devices.
Settings#
Use Settings to configure global app behavior.
Units#
Set units for:
Distance and speed
Runway length
Altitude
Pressure
Coordinates
Logbook Time
MAP#
Approach charts - Select how approach charts are displayed:
Manual
Auto - departure/arrival aerodrome
Auto - route aerodromes
Auto - nearest aerodrome
TRK/Bearing - Select magnetic or true north
Clear cached data (e.g. SmartChart tiles)
VFR Auto Routing#
Enable or disable VFR Auto-Routing. When enabled, Air Navigation will offer to compute the optimal path on route creation and direct to request.
Instruments#
Set north reference
Enable or disable audio effects
Network#
Enable exchange data with WebDAV Server and Embedded Web Server
Enable mobile data for big downloads
MISC#
Use this section to configure:
Account for climb/descent in time estimate
Show ETA and date
Note
These options may affect the Cruise altitude.
Show or hide the startup disclaimer
Send diagnostic data (on request from support)
Reset settings to factory defaults
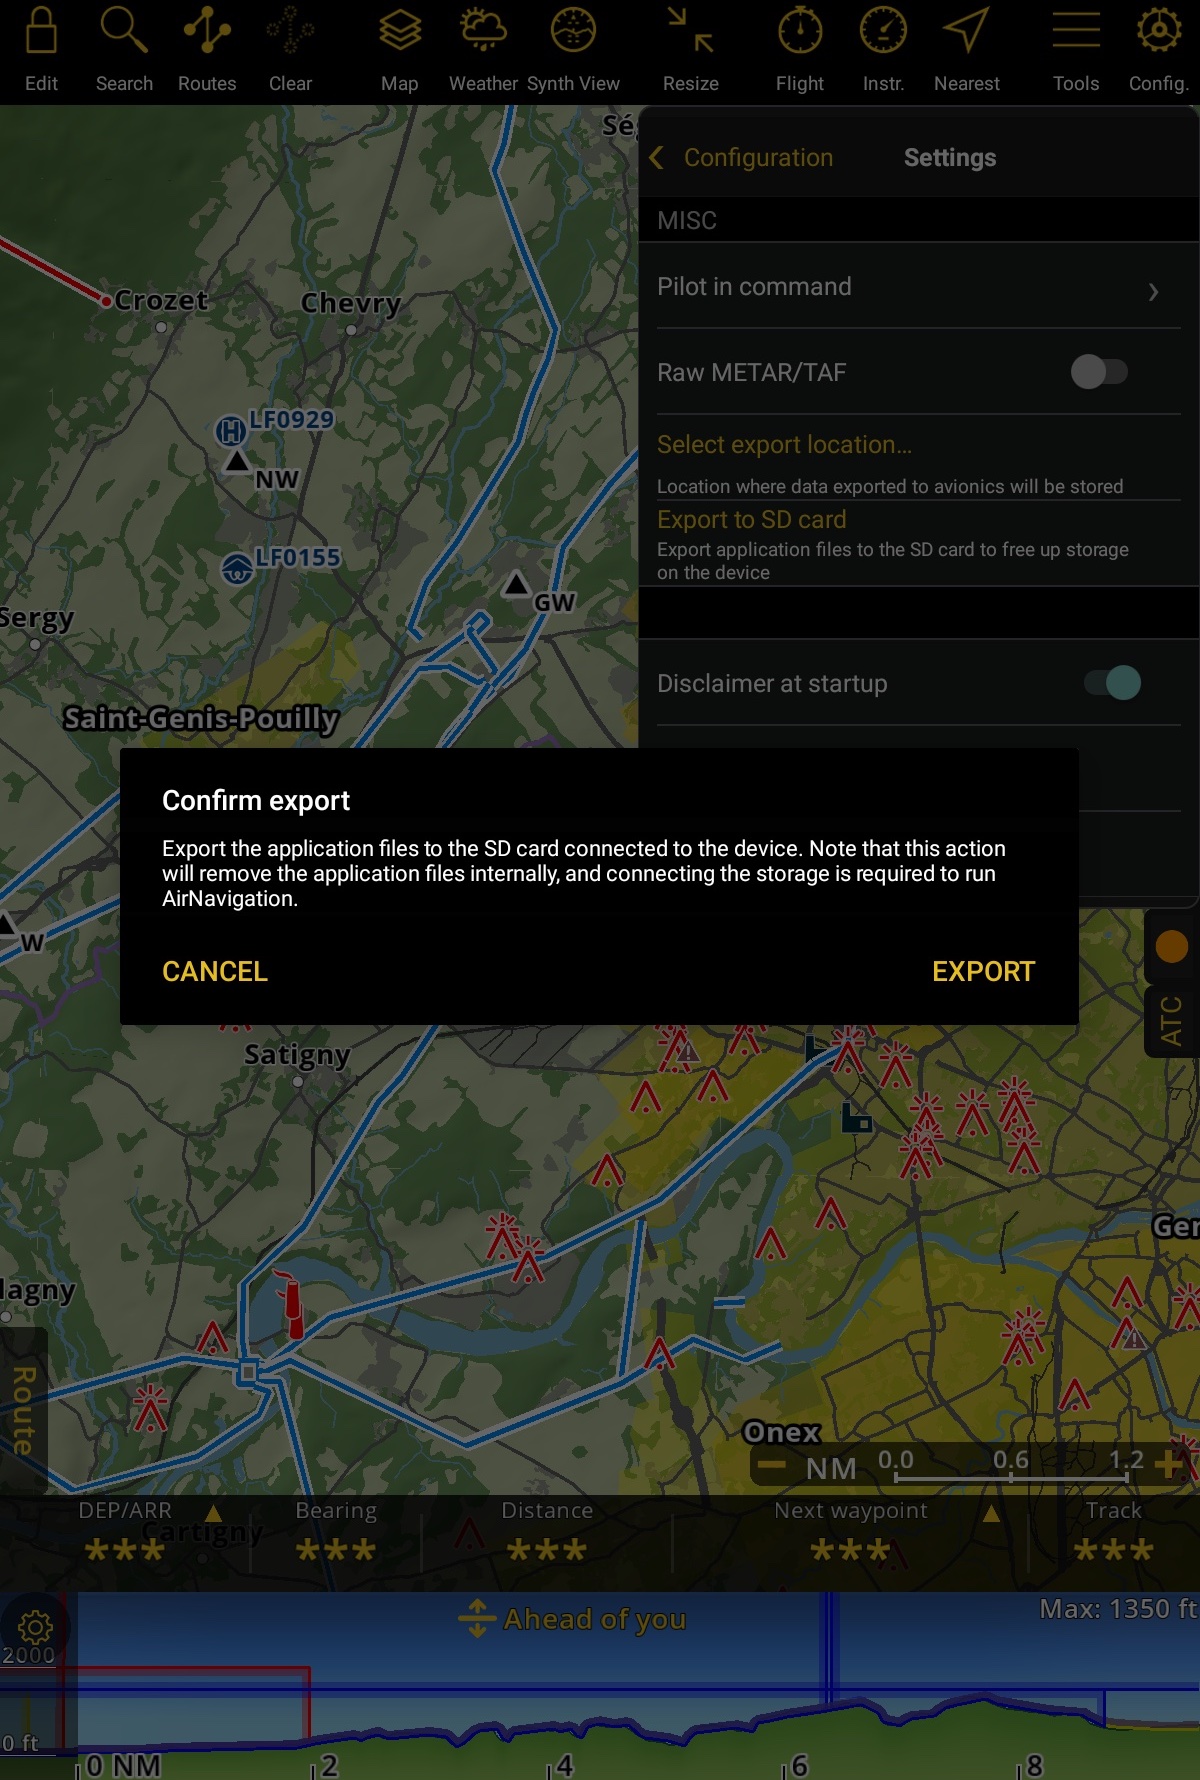
Export to SD Card (Android only)#
Move data to an SD card to free internal storage.
Requirements:
SD card with at least 30MB/s speed (SDXC U3 or better)
Sufficient available space
Tap Config (Configuration) > Settings
Scroll to MISC
Tap Export to SD card
Tap EXPORT
Restart the app
About#
View the current app version.
Use this when contacting support.
You can also access What’s New and software licenses.
Disclaimer#
Displays the Disclaimer.
Privacy policy#
Redirects to our privacy policy.