Profile View#
The Profile View is a graphical representation of terrain elevation along your route, ahead of your aircraft or within a measured area on the map. It’s a vertical cross-section of the terrain, providing a clear and intuitive overview of the elevations. This helps you choose an adequate altitude, avoid terrain collisions and ensure a safe and efficient flight.
Access#
You can activate this feature by toggling it ON in the Map options menu or by dragging the Navigation Bar up with one finger. Drag it back down to make it disappear.
UI Components#
|
|
|
|
|
|
Modes#
The Profile View has three different modes:
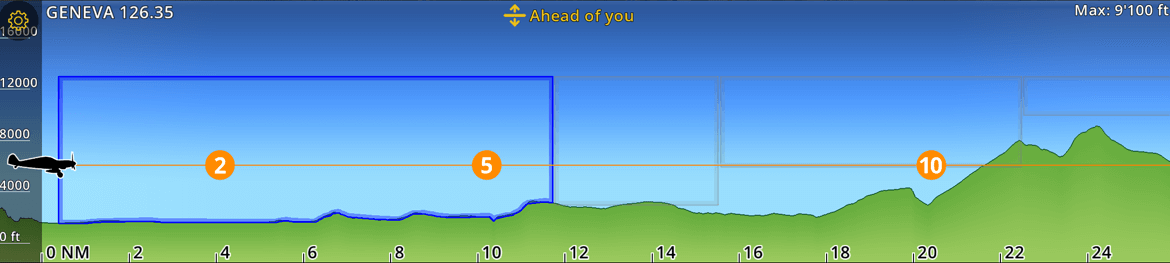
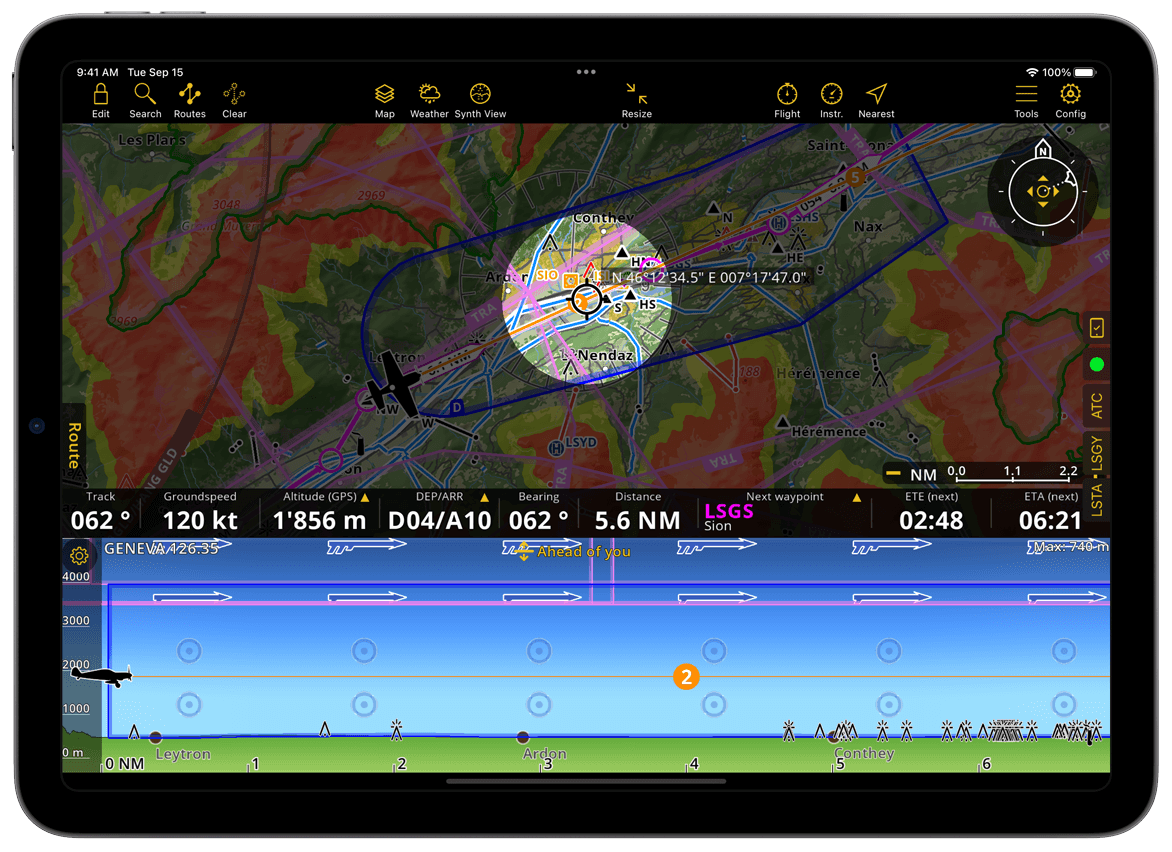
Ahead of you: This mode displays the terrain profile ahead of your track while flying. When stationary, it’s configured to show the terrain facing north. Without an active route, it’s the default view in Flight Mode.
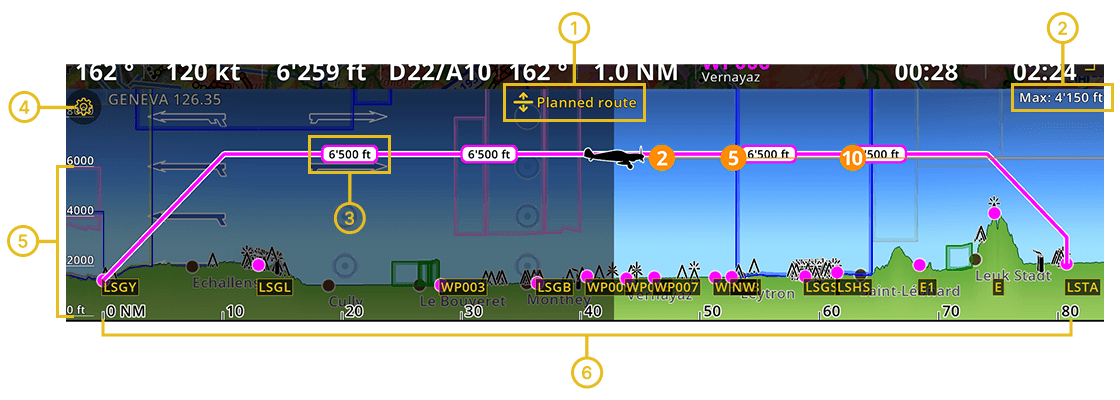
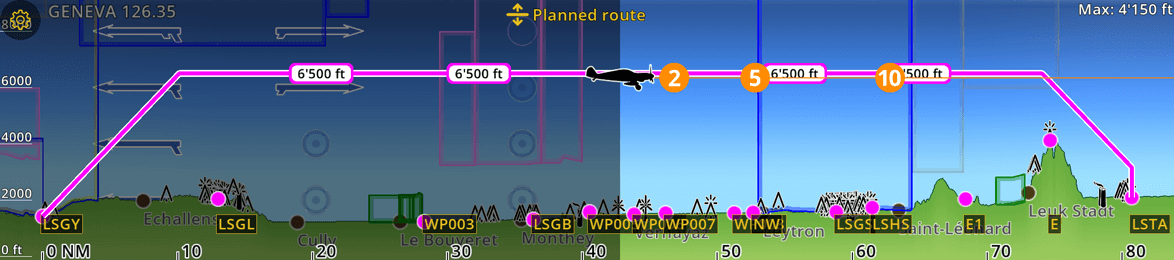
Planned route: This mode displays the terrain profile along your route, featuring the intended route track as a magenta line with labels indicating the planned altitude for each leg. It’s the default view in Edit Mode, as it facilitates easy vertical route planning.
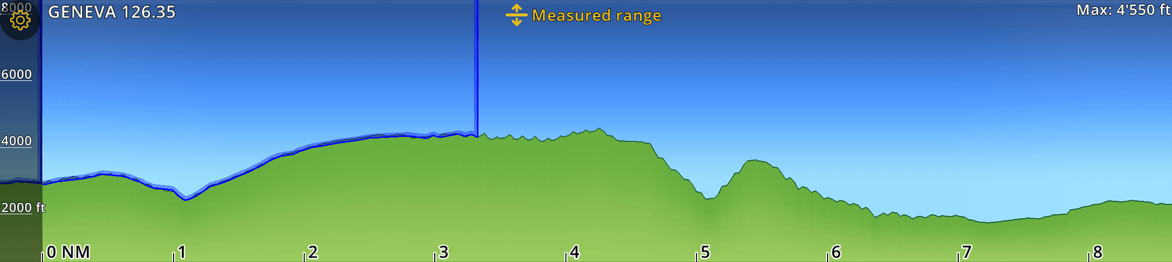
Measured range: While measuring the distance between two points in the Moving Map using the Ruler, this mode displays the terrain profile along the measured area. It’s active only when the ruler tool is displayed on the map.
Hint
Easily toggle between Ahead of you and Planned route with a tap on the yellow mode name at the top center of the Profile View.
Settings#
Tap the gear icon at the top left of the Profile View to open a menu with additional settings, allowing you to customize the overlay display.
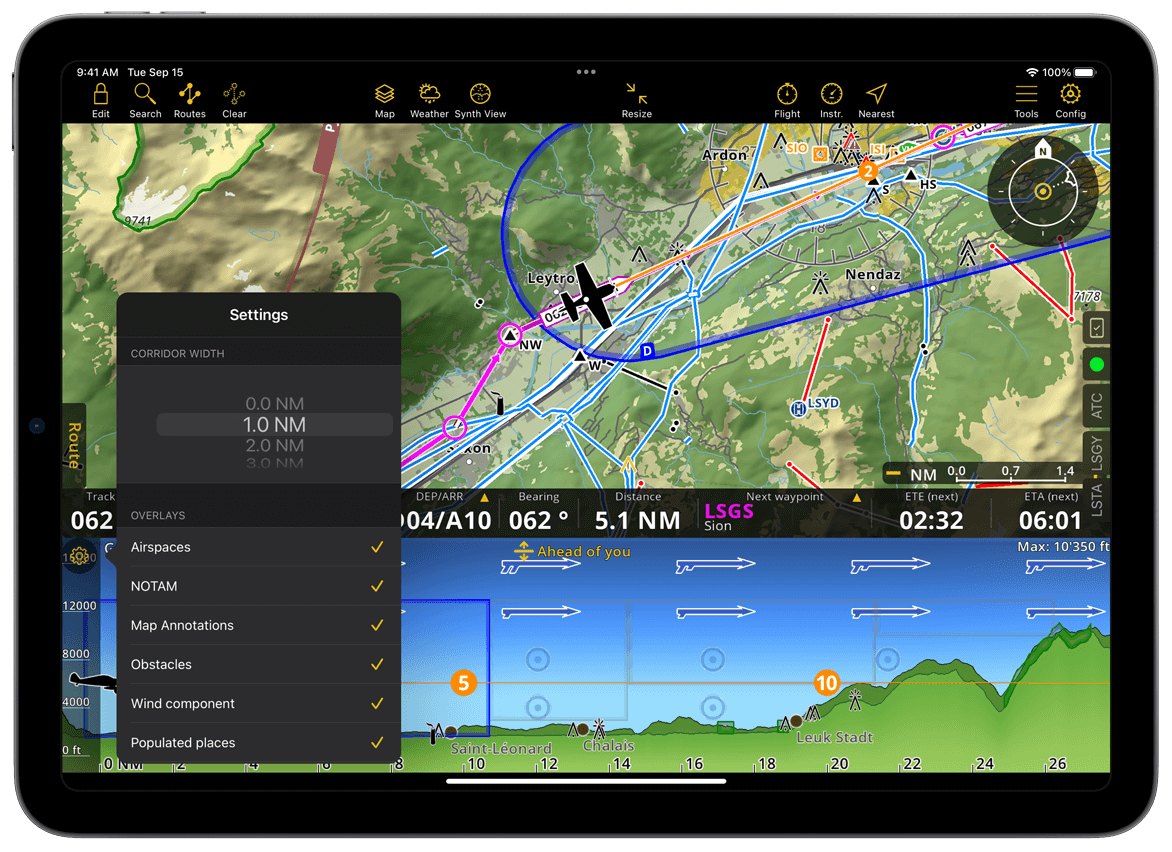
You can adjust the corridor width from 0 to 5 NM. You can choose which of the following overlays to display on the Profile View by tapping on them: Airspaces, NOTAM, Advisories, Map Annotations, Obstacles, wind components, populated places, position at time and Gliding range. A yellow checkmark indicates the selected options.
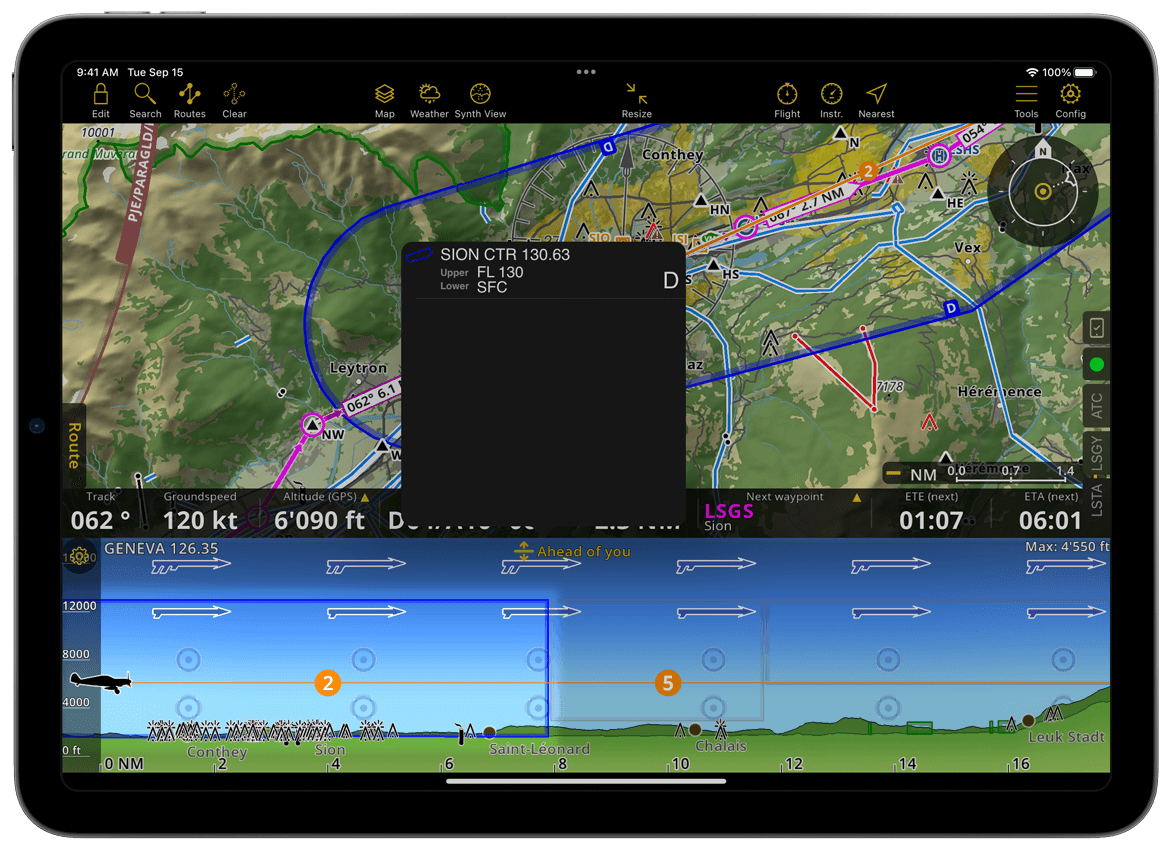
The Position at time option will display an orange line showing your flightpath trend with 2, 5 and 10 min indicators estimating your trajectory over time. The wind components will show live wind vectors directly on the Profile View. If you wish to activate these features on the Moving Map as well, refer to Map Options > Guides.
Gestures#
Resize Profile View: You can adjust the size of the Profile View by placing a finger on the yellow mode name and dragging it up or down. Dragging the Navigation Bar all the way down will hide the Profile View completely. To make it visible again, simply drag it back up.
Zoom In/Out: To zoom horizontally, pinch with two fingers along the terrain. To zoom vertically, slide one finger along the altitude scale.
Aircraft Position: When your current position, represented by the aircraft, is no longer visible while panning or zooming ahead, an aircraft bubble
 will appear on the left border of the Profile View. Tap the icon to quickly return the display to your current location.
Location on the Map: Long press any point on the distance scale and the corresponding location on the Moving Map will be highlighted, while the rest of the map dims. This feature is not available in Measured range mode.
Interactive Items#
Map Overlays: Airspaces, NOTAM, Advisories, and Map Annotations displayed in the Profile View can be tapped to reveal a popover with additional details.
On Planned route mode only:
Warnings: In Flight Mode, if your planned vertical trajectory cannot be achieved or collides with terrain, a yellow warning icon will appear at the exact point on the route. Tapping it will provide more details and instructions on how to resolve the issue.
Waypoints: In Edit Mode, the waypoints of your planned routed become interactive. You can adjust the altitude of specific segments by dragging them up or down. Tap on a waypoint to open a popup window with additional options. Read more on Route Planning.
