

Import / Export data#
It is possible to import data into the app’s database and export data created inside Air Navigation Pro. This allows you to backup your data before reinstalling the app, transfer data from one device to a another, share information with family, friends or colleagues, and add useful files to the app.
PDF files & Air Navigation Pro data#
PDF files you want to import into the app can include any useful documents you need easily accessible for flying, such as your aircraft manual or checklists. Data created inside the app that can be imported and exported includes:
Aircraft profiles
Routes
Waypoints
Airspaces
User Waypoints
Recorded Flights
Logbook
There are several ways to achieve this: via the Share/Open With option, by accessing a Web Server or with WebDAV.
Share/Open With#
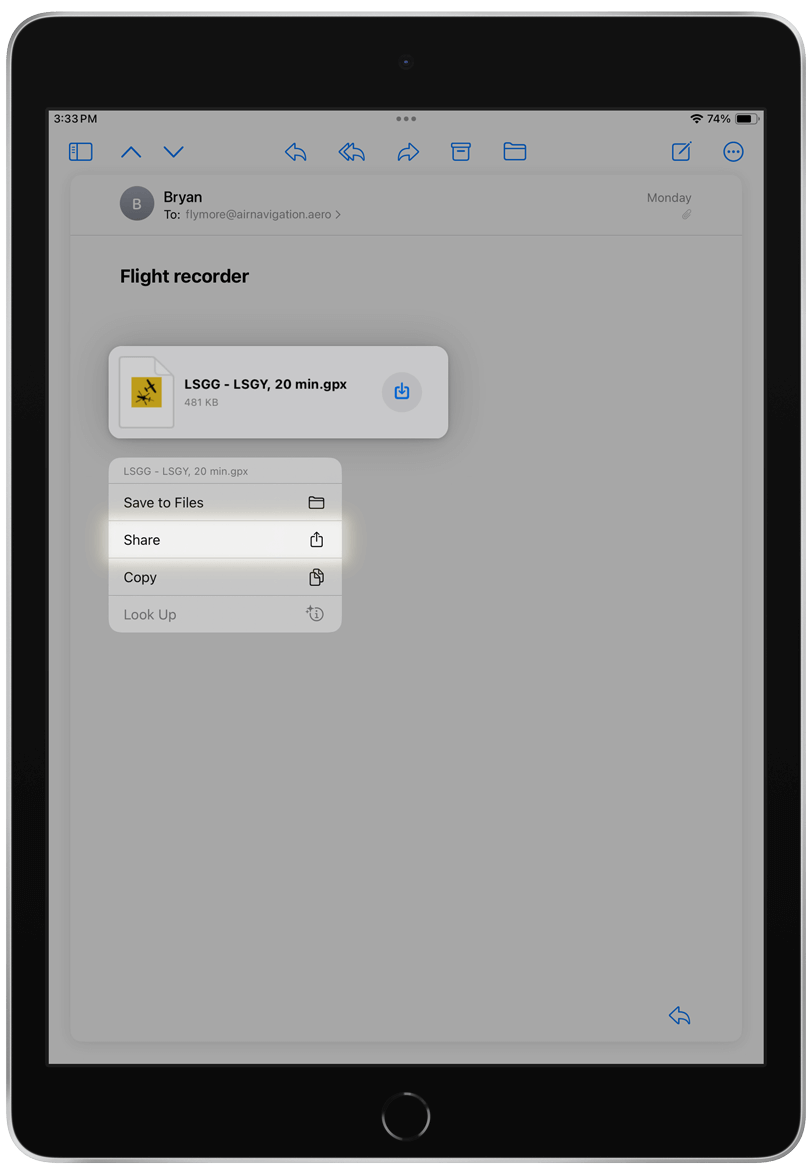
The simplest way to export data is via the share option. This allows you to export individual data and save it to your files or share it via email, iOS AirDrop or any other social app available on your device. Find below the instructions on where to find the share option for each file type.
Note
To be able to send it via email, you need to have an email account configured on your device.
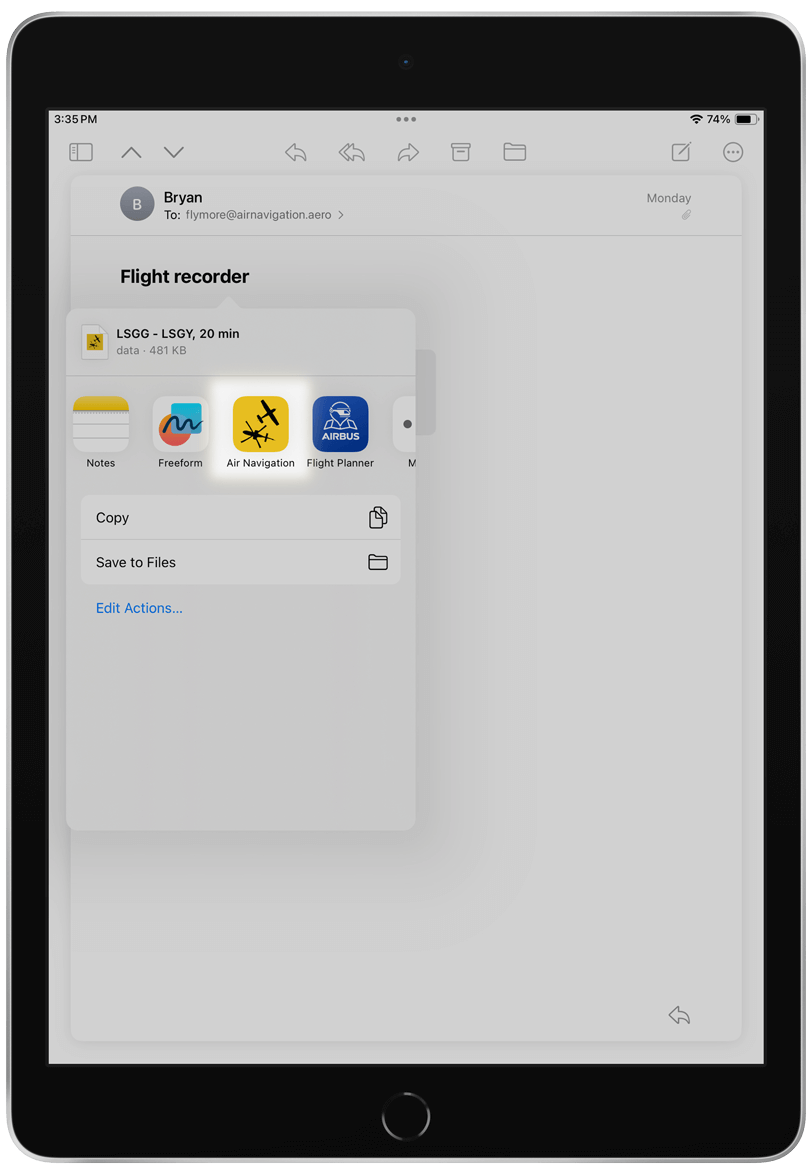
For importing an Air Navigation Pro data file into the app, you can easily select the file you want to import from your files, email attachments or a cloud drive service, and choose to share or open with Air Navigation Pro. You can also share the file via iOS AirDrop from another device.
Routes#
You can export your current route as GPX or GPXA format. On the tablet version, open the Navigation Dashboard by tapping Resize or the Route shortcut. On phones, tap the  icon in the mobile menu bar. In the upper right corner of your route’s navigation log, tap the
 ![]() icon to open more options and tap Share. Choose the desired export format and sharing option.
icon to open more options and tap Share. Choose the desired export format and sharing option.

Waypoints#
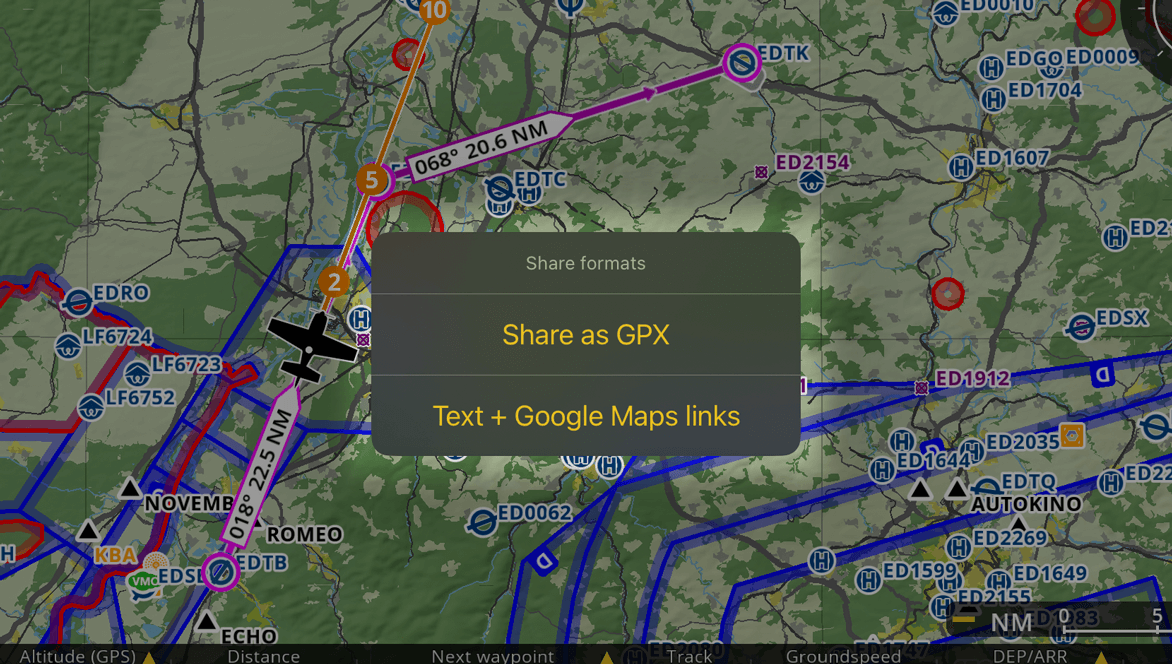
You can export individual waypoints as GPX file or as Text with Google Maps link. For this, tap on a waypoint on the map and open more options through the ![]() icon. Tap on Share, choose the desired export format and sharing option.
icon. Tap on Share, choose the desired export format and sharing option.
Note
If you choose the text format, the app will not create a text file but instead input the text as email content. You can always copy the text and manually share it via other sharing options.
User Waypoints#
You can share one or several user waypoints as Air Navigation Pro format, GPX or Text with Google Maps links. On the tablet version, go to Tools in the Menu Bar and then User waypoints. For phones, you’ll find the User waypoints menu on the Tools section in Configuration. In the upper right corner, tap Options > Select waypoints to share. Now you will be able to select the waypoints you want to share. A yellow checkmark will indicate the selected ones. Tap on the share icon in the upper right corner, choose the desired format and then your sharing option.

Note
If you choose the text format, the app will not create a text file but instead input the text as email content. You can always copy the text and share it via other sharing options.
Recorded Flights#
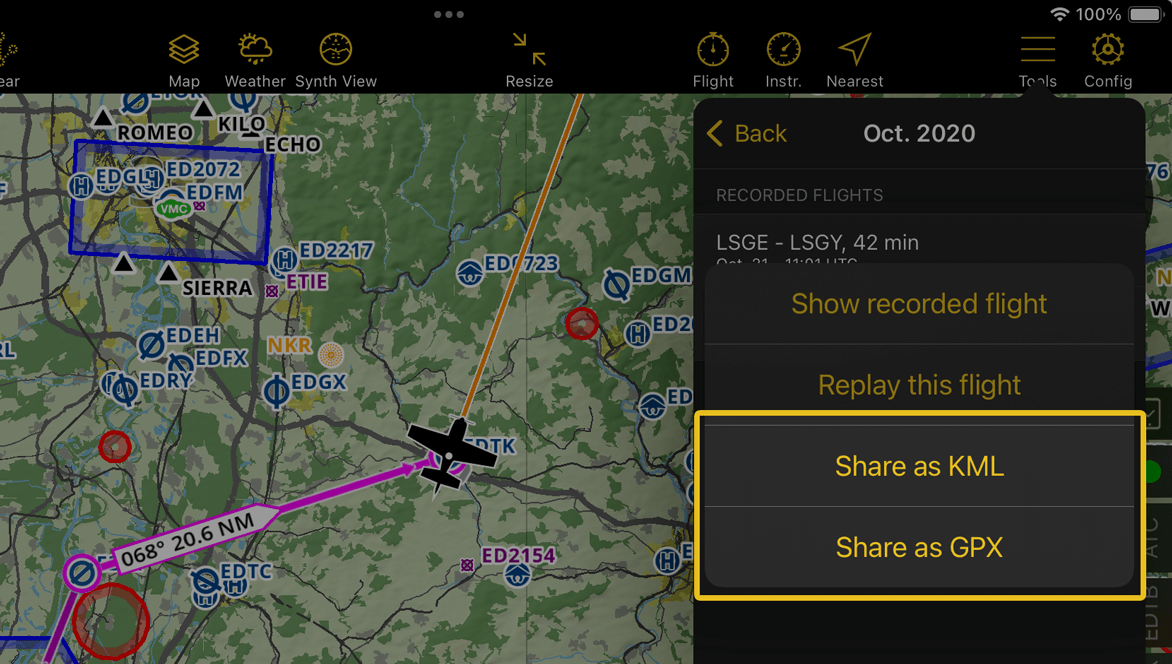
You can share the recorded track of a flight as KML or GPX format. Go to Tools > Flight Recorder > Recorded flights and tap on any flight you want to share. On the mobile version, the Flight Recorder is inside Configuration. Finally, choose the desired export format and sharing option.
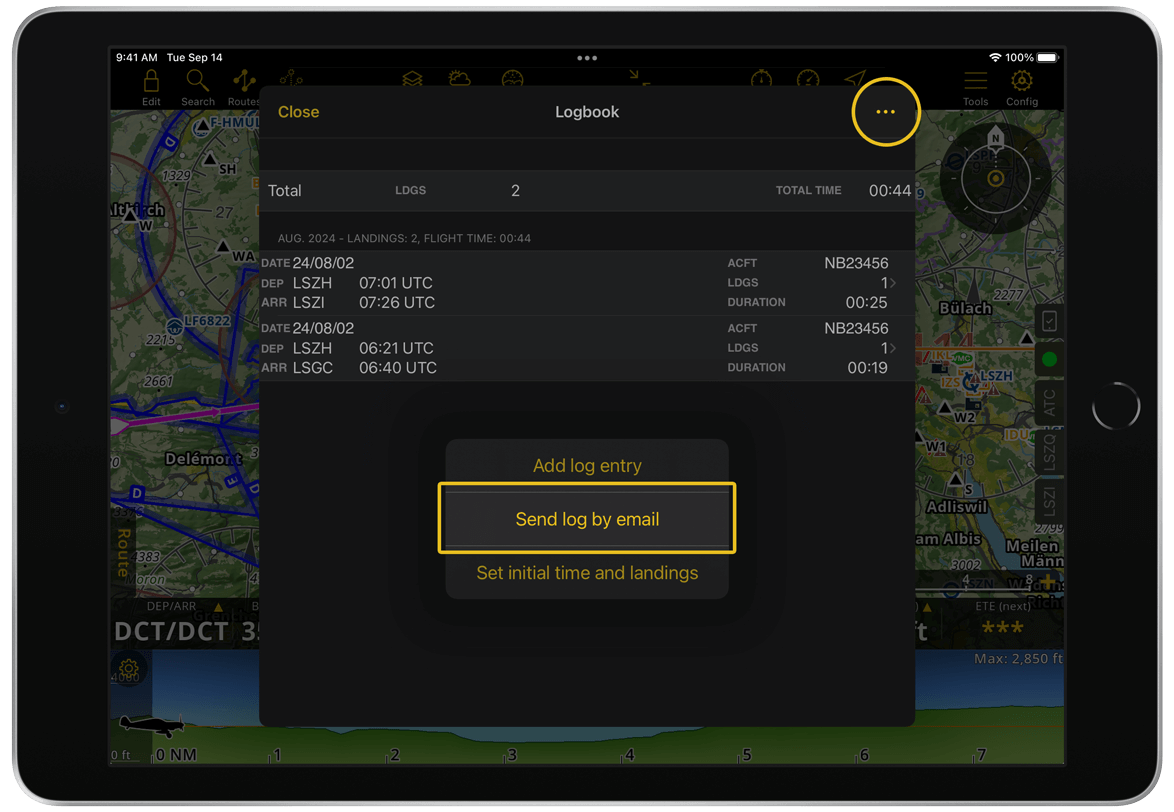
Logbook#
Under Tools in the Menu Bar or inside Configuration on your phone, you can access your Logbook. Tap the … icon and Send log by email. Currently, the only supported option to share your Logbook data is via email. You can choose to include all your flights or select specific flights to share. A yellow checkmark will indicate the selected ones. When you are done, tap the share icon. The app will create a logbook table as email content and a txt file, which will be added as an attachment.
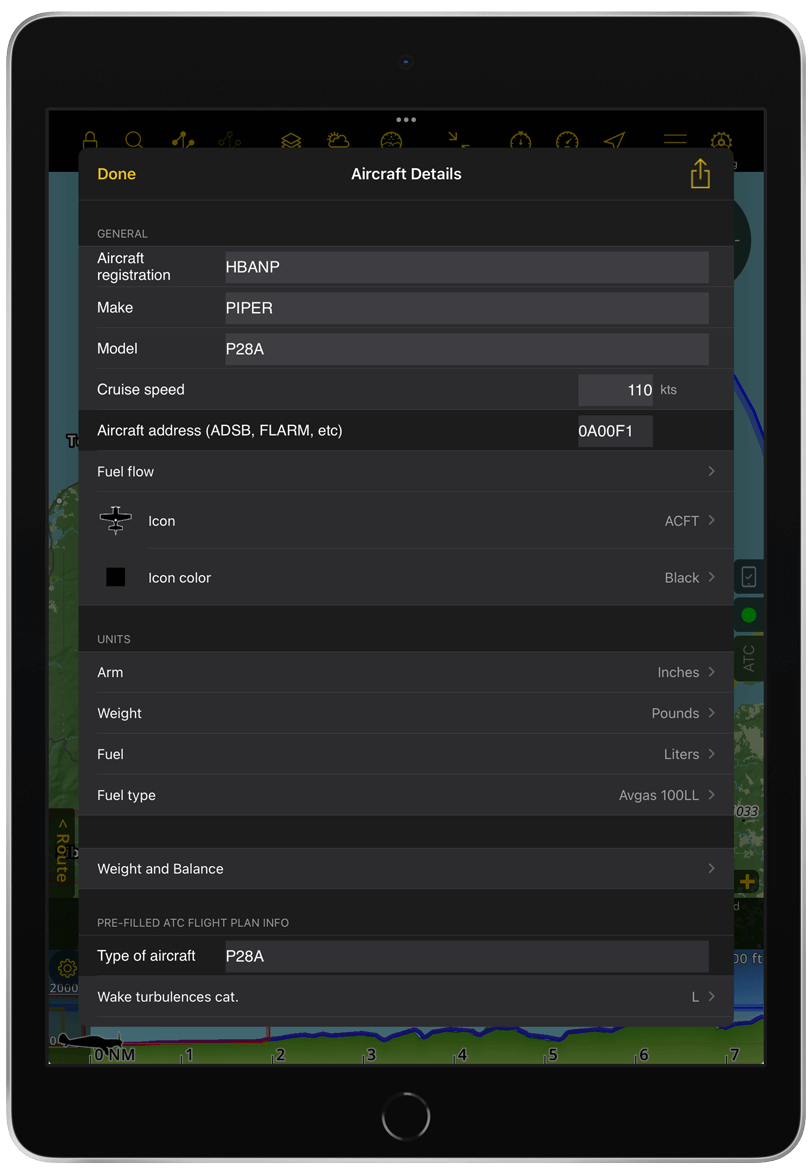
Aircraft profile#
You can share an aircraft profile as ACP file. In Flight parameters, make sure the aircraft profile you want to share is selected and open the Edit aircraft window. In the upper right corner, tap Share.
Documents#
Once imported into the app, you can find your PDF files on the Documents section under Tools. There, you can also share your documents from the app using the share icon in the upper right corner.
Embedded Web Server#
This method enables you to efficiently manage the import and export data from another device through a web server.
Important
Both devices must be connected to the same network.
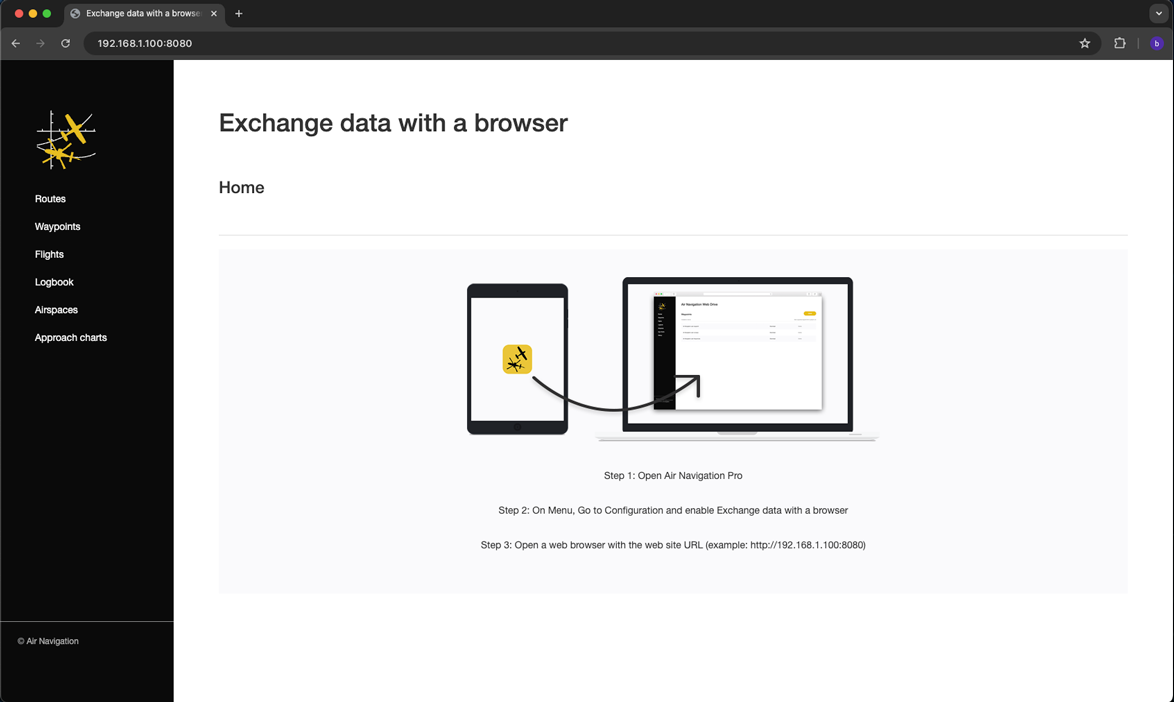
Follow these steps to access the web server:
In the app, go to Configuration > Settings > Exchange data with a browser and toggle it ON
Note the Web site URL address that appears below once enabled

Open the browser on another device or computer
Enter the Web site URL from the app into your browser
The available categories of data on the web server are:
Routes - The Route Status column has three types: Bookmarked (routes that have been saved from within the application), Recent (Unsaved or newly created routes), and Local (routes imported into the application or uploaded via the website).
Waypoints - User created waypoints with associated frequencies and runways will appear in the table as three separate rows: Air Navigation user waypoint, Air Navigation user frequencies, and Air Navigation user runways. These entries will increase in number based on the user-created waypoints.
Flights
Logbook
Airspaces
Approach charts
Click on the categories of your choice on the left side
Manage your files from this page:
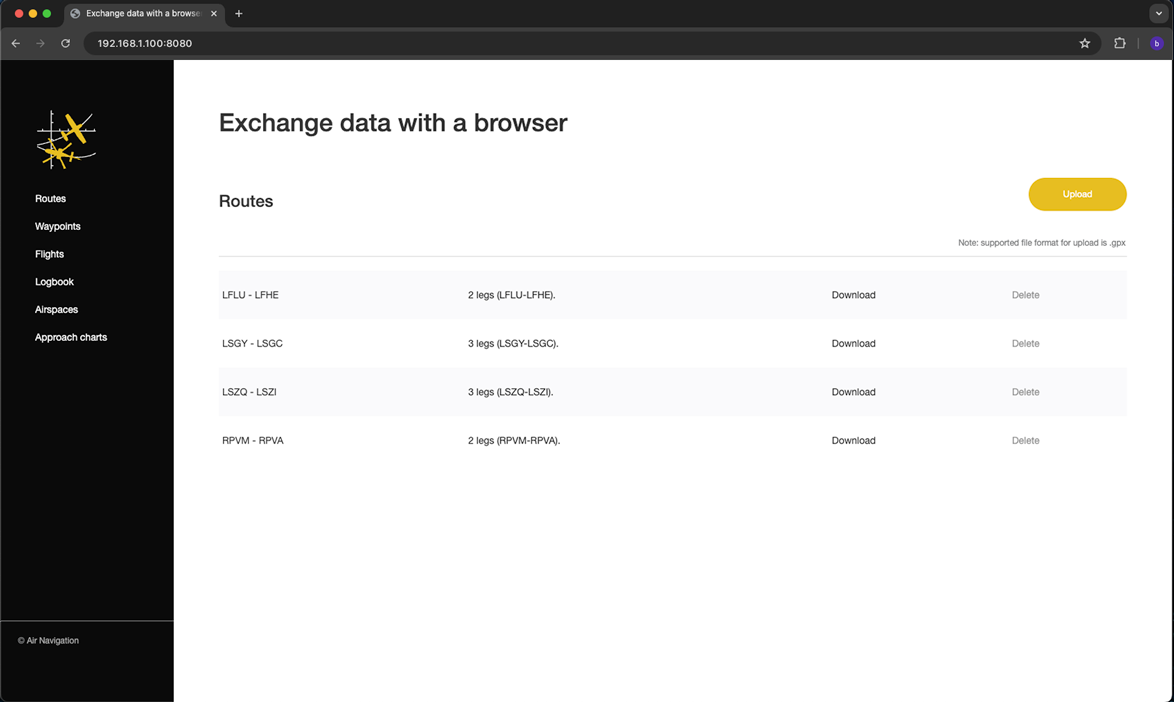
To upload:
Use the yellow Upload button at the top
Select the file from your device on the popup window
Click Open to upload the selected file
Note
Below the Upload button, you’ll find information on the supported formats. Make sure you upload the correct file format before proceeding.
To upload a PDF document, choose the category Approach Charts. All approach chart documents are supported, including those whose file names do not start with an ICAO airport code or a three-letter country code.
To download:
Choose the file you want to download, then click the download button from Actions
The file will be saved to your local drive
WebDAV Server#
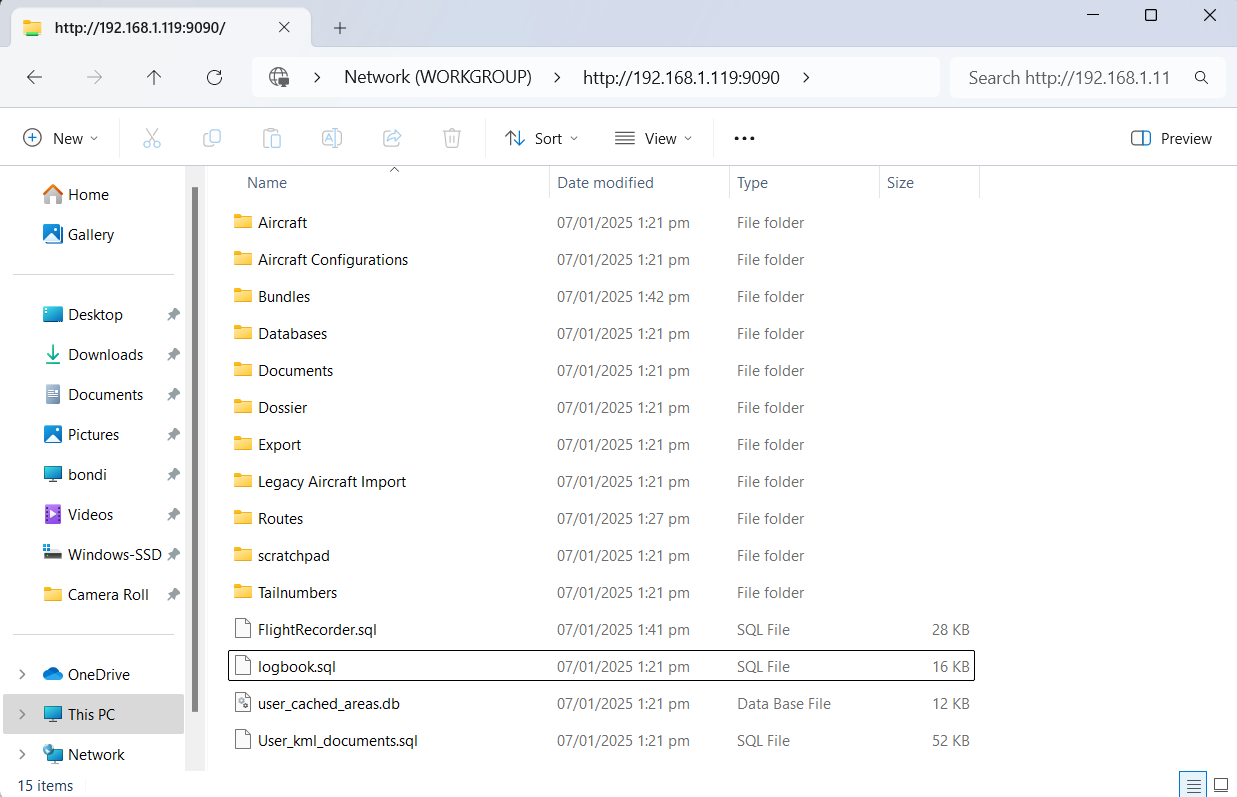
WebDAV is a file server protocol based on the HTTP protocol. It is natively supported by most operating systems: Windows, macOS and Linux. Essentially, it mounts the content folders of your Air Navigation Pro as a network server on your computer. WebDAV allows you to manipulate files as if they were on a USB drive connected directly to your computer. With this method, you can copy and paste multiple files simultaneously.
To begin:
In the app, go to Configuration > Settings > Exchange data with a browser and toggle it ON
Note the WebDAV URL address that appears below once enabled
Example: http://192.168.1.46:9090
Windows#
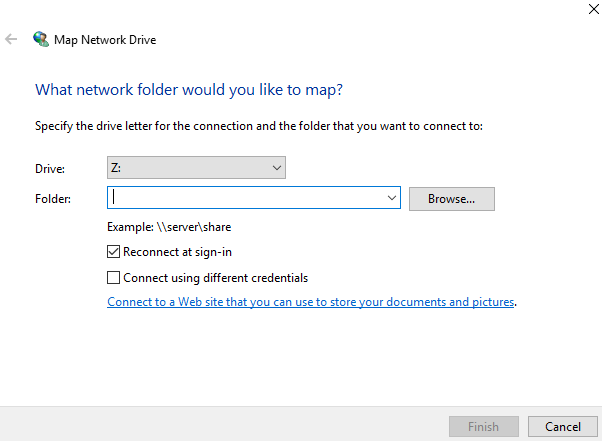
Open My Computer from the Start Menu and select Map Network Drive
Click on the link on the bottom: Connect to a Web site that you can use to store your documents and pictures
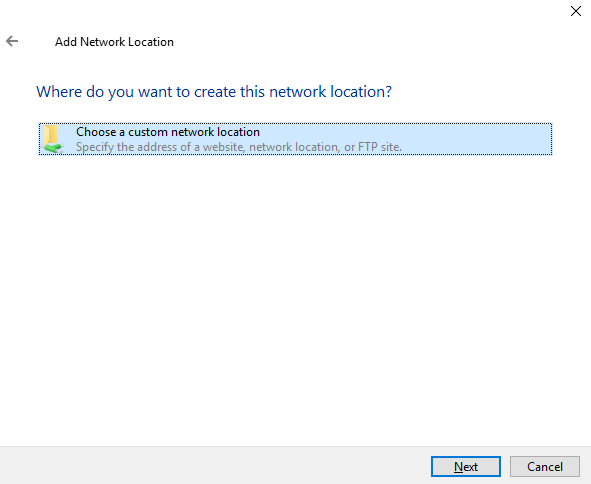
Click on Choose a custom network location
Enter the WebDAV from your app on the network address field
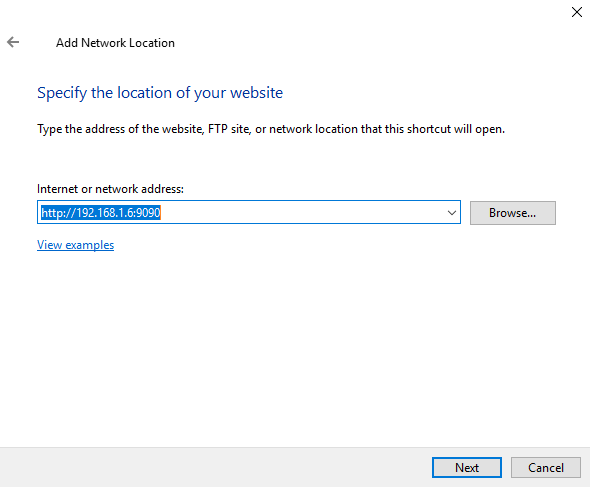
Click on Next and choose a name to identify your device
Access your device like an external hard disk
MacOS#
In the Finder menu, click on Go and select Connect to Server
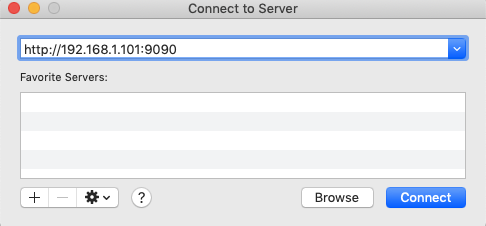
Enter the WebDAV address from the app on the Server Address field
Click Connect
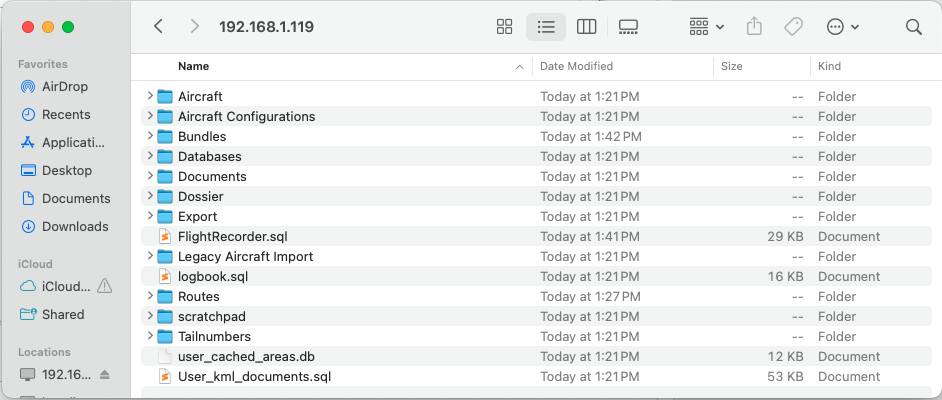
Your device will now appear under Locations as a connected hard drive
User Waypoint#
Users can use the “backup waypoints” option to keep their created user waypoints in a file that will then be copied from iTunes/file manager at the moment of synchronization. That file can be copied to another device then and the option «restore waypoints» will bring them back.
Backup all created user waypoints#
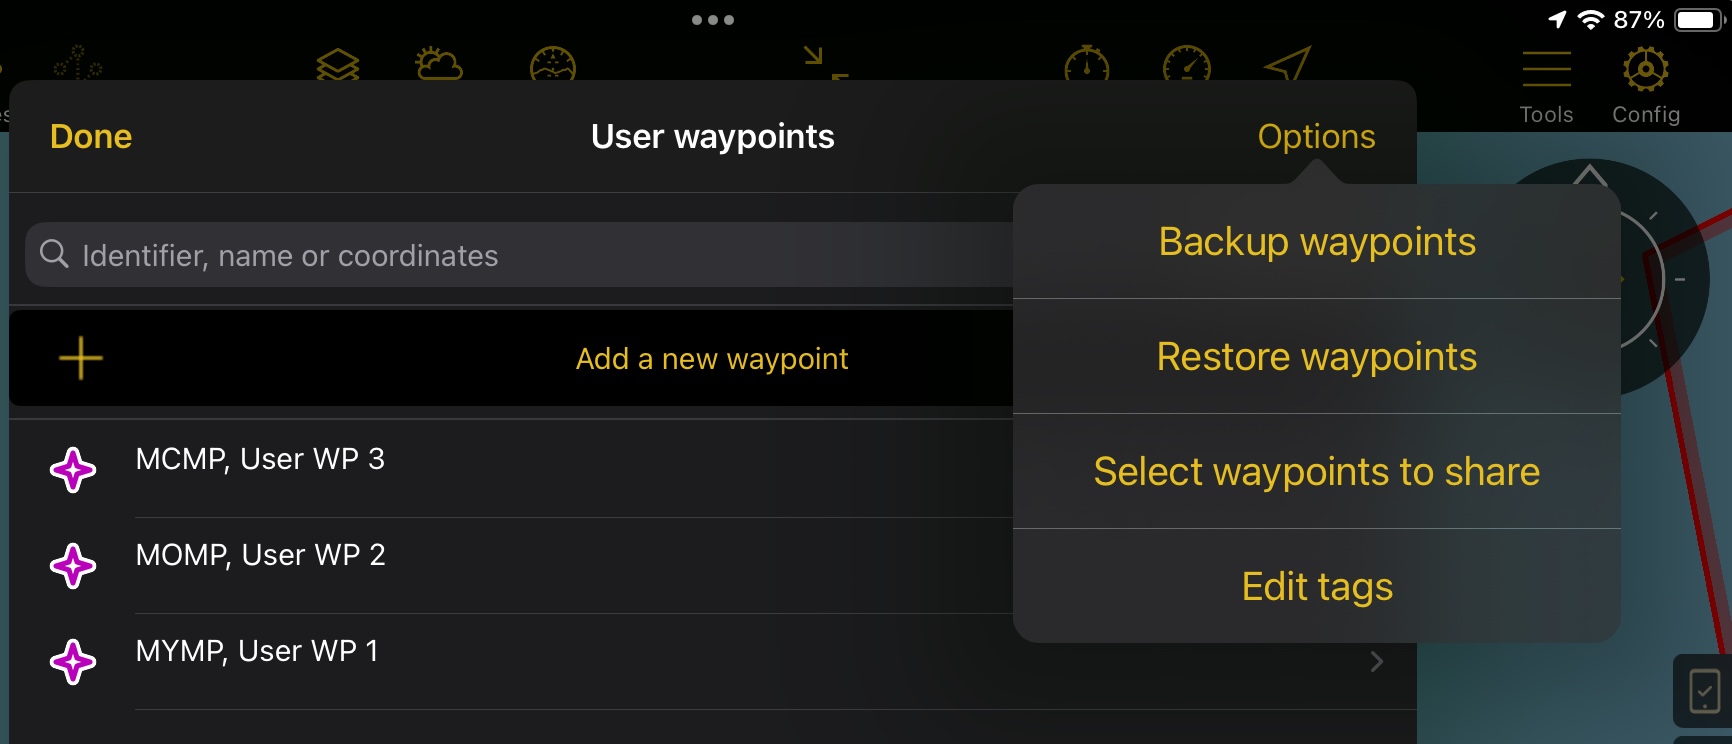
Under Tools > User Waypoint
Tap More options on the upper right and select ‘Backup waypoints’
All the created user waypoint will be saved in your device’s local storage assigned for ANP
Backup file can be copied from iTunes or file manager app
Restore created user waypoints#
Under Tools > User Waypoint
Tap More options on the upper right and select ‘Restore waypoints’
Warning popup will appear, saying warning users the operation could replace existing user waypoint with the one restored from the backup files, and it cannot be undone.
Tap Replace to proceed with the restoration. Otherwise, tap Cancel.
List of user waypoints is replaced by the user waypoints from the backup file restored.
KML Files#
Air Navigation Pro only supports the basic use of KML files, including various shapes such as lines, polygons, and points, along with their associated colors and names.
The following are the accepted markups in Air Navigation Pro for KML:
<Document> |
<color> |
<description> |
|---|---|---|
<Style> |
<width> |
<styleUrl> |
<IconStyle> |
<StyleMap> |
<Point> |
<LineStyle> |
<Pair> |
<LineString> |
<PolyStyle> |
<styleUrl> |
<Polygon> |
<Icon> |
<Placemark> |
<MultiGeometry> |
<href> |
<name> |
<coordinates> |
KML documents can be imported into the app only via Share/Open With option. After imported, the KML elements are displayed on the moving map and are interactive. Information is displayed when tapping on them.
To import a KML file:
Open the KML file from your files, your email attachments or via iOS AirDrop
Select the share or open with option and choose Air Navigation
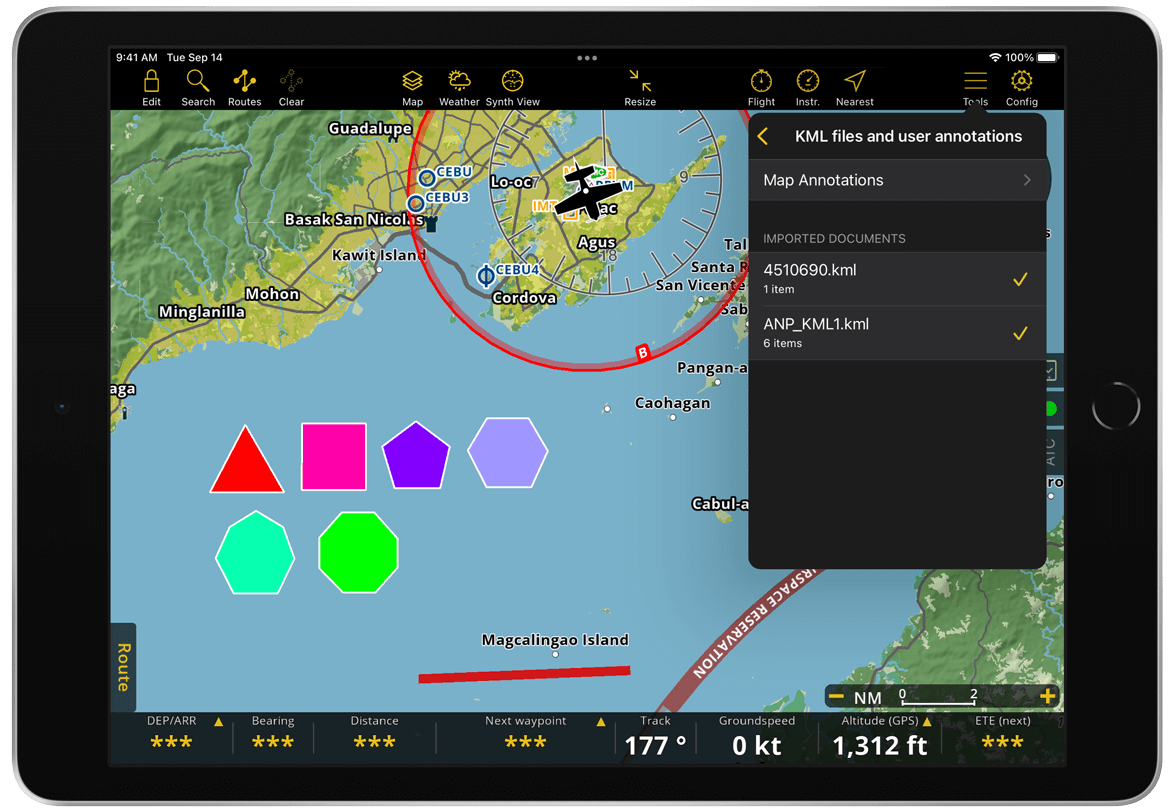
Air Navigation Pro will open automatically and display the imported KML shape on the moving map
Note
For KML points, the name or ID is displayed next to the marker on the moving map.
By default, imported KML files are displayed on the map. To manage their visibility, go to Tools > KML files & Map annotations. You will find your KML files list in the Imported Documents section.
To import a KML file using Air Navigation Manager, refer to the Manager Manual. After publishing your data, follow these steps to view the KML files in the app:
Ensure your organization or group is selected in Configuration > Air Navigation Manager
Go to Manage Data and Products and synchronize your organization’s data
You will find the KML files list from Manager in the Organization Documents section under Tools > KML files & Map annotations.
User Maps#
You can import your own maps to use as backgrounds for the Moving Map. The supported formats are: MBTiles and GeoTIFF. Maps can only be imported into the app via the Share/Open With method.
Follow these steps to import a map into Air Navigation Pro:
Ensure your map is in a supported file format, such as .tiff, .tif, or .mbtiles, and contains the necessary geographic data
Access your map from your files, email attachments, a cloud storage service or send it to your device via iOS AirDrop
Open the file and tap on the share/open with option
Select Air Navigation
Air Navigation Pro will open automatically and display either a sucess or error message
Go to Configuration > Manage Data and Products
Inside the Smart Advanced folder, search for the Import your own map feature on the list and tap on it
Your custom map should appear here once import and instalation is completed
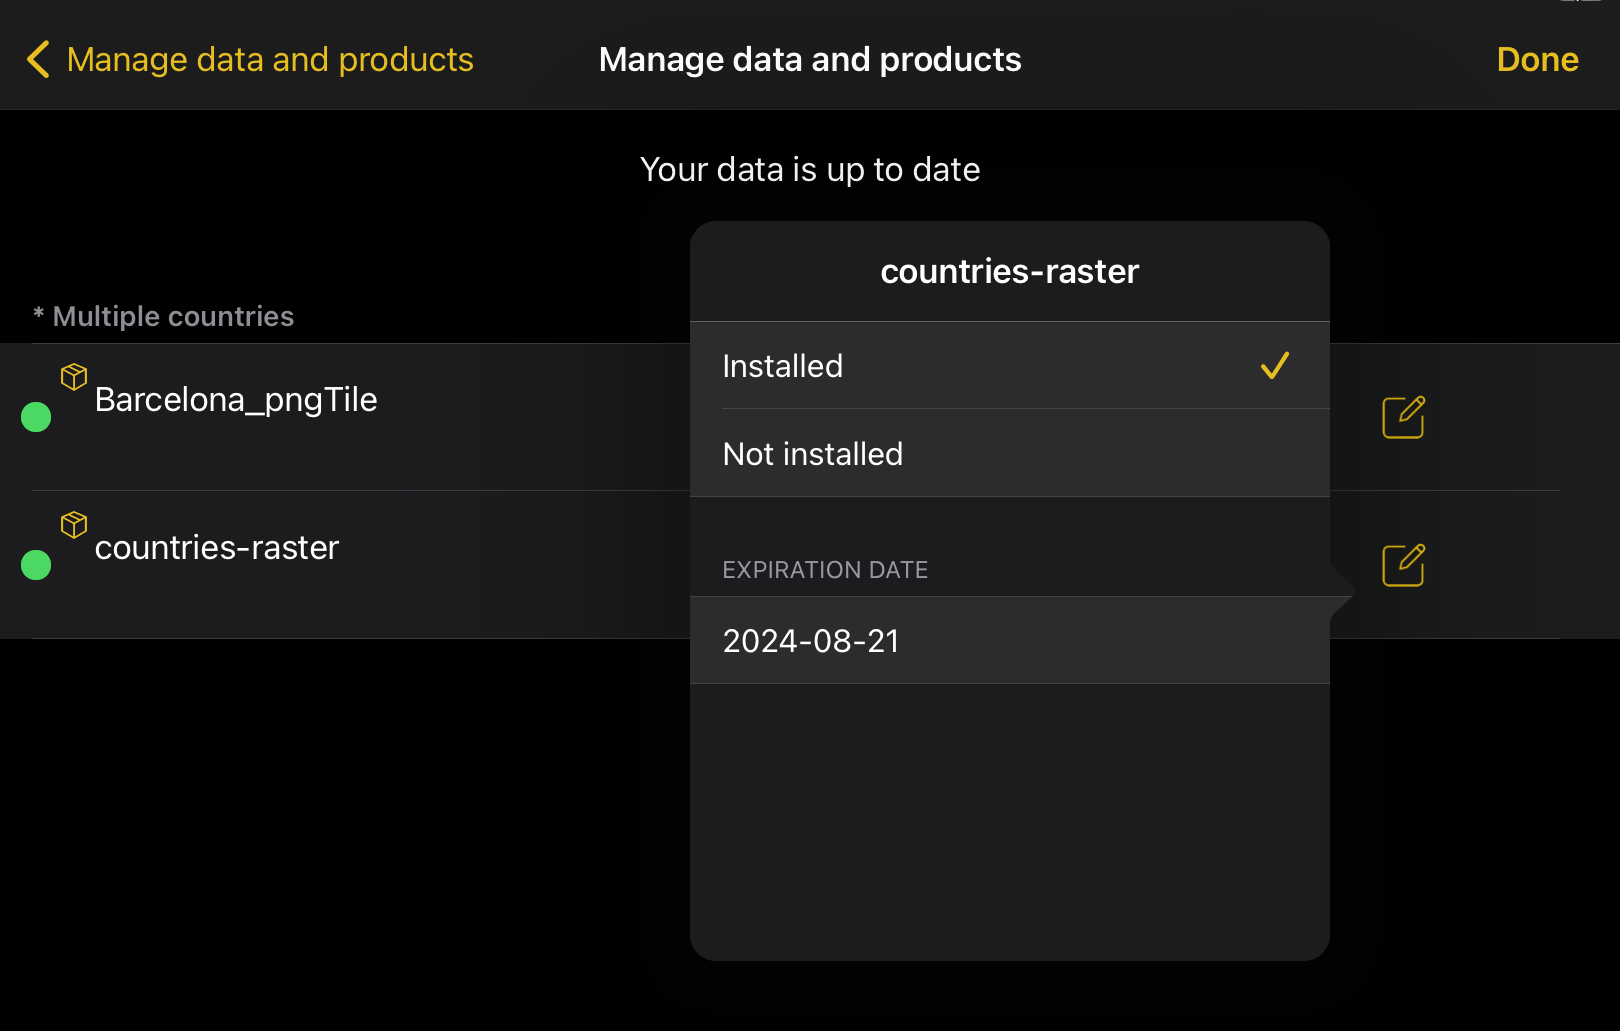
If you wish to permanently delete the map from your device, select the Not Installed option. Keep in mind that to reinstall it, you will have to import the map again.
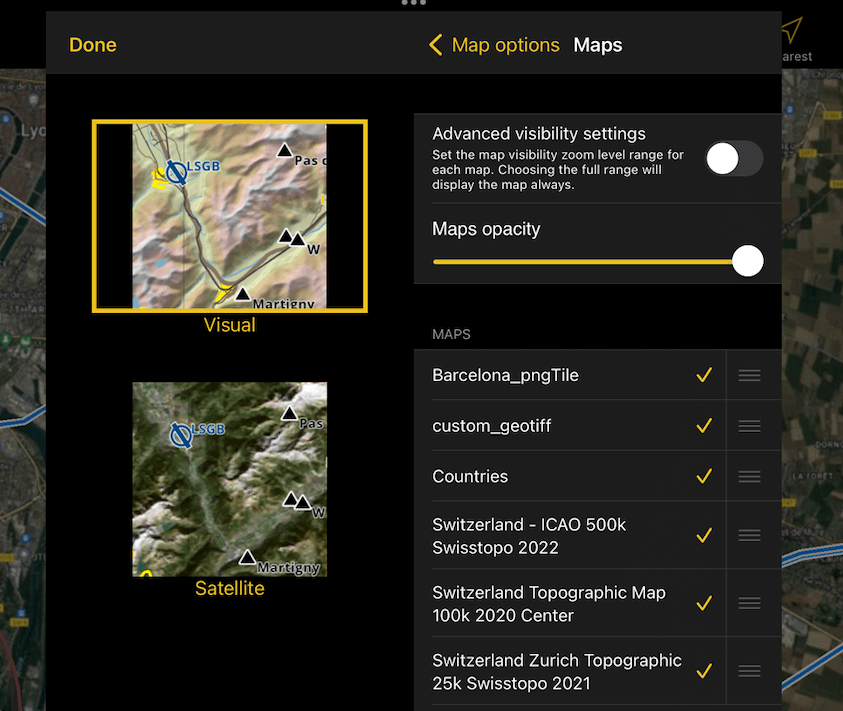
To display the imported map on the Moving Map, go to Map Options > Maps and make sure it’s selected. You can also adjust the map visibility zoom level and opacity.
Note
This feature is only available for Smart Advanced subscribers.
Important
Make sure your device has enough storage space for the imported map files. Large map files can take longer to import as they may require additional processing time or optimization for better performance within the app.