

Simulators#
How to Use XMapsy as bridge to Air Navigation Pro and Flight Simulator (Flight Simulator 2020)#
Installation of XMapsy#
Get the installer of XMapsy from http://xmapsy.com.
Follow the instructions on the website on how to install on your computers.
On the taskbar, right click on XMapsy and select Settings. Follow the setup below.
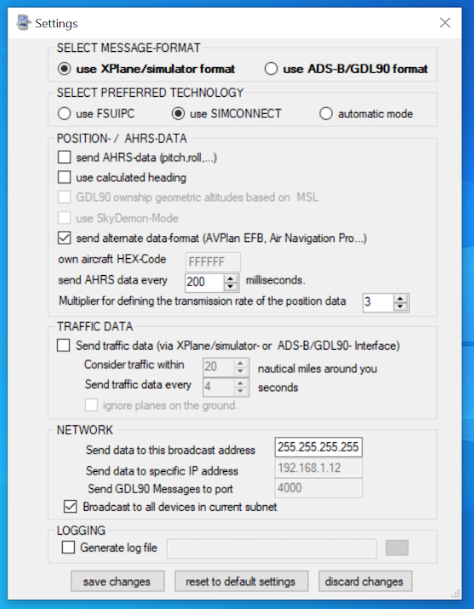
Click Save Changes.
Use XMapsy as bridge to Air Navigation Pro and Microsoft Flight Simulator#
XMapsy runs in the background and does not influence your simulator configurations. Once launched, it will only be visible as an icon in the tray and automatically connected to the MSFS 2020
On your computer icon tray click the XMapsy and select Connect .
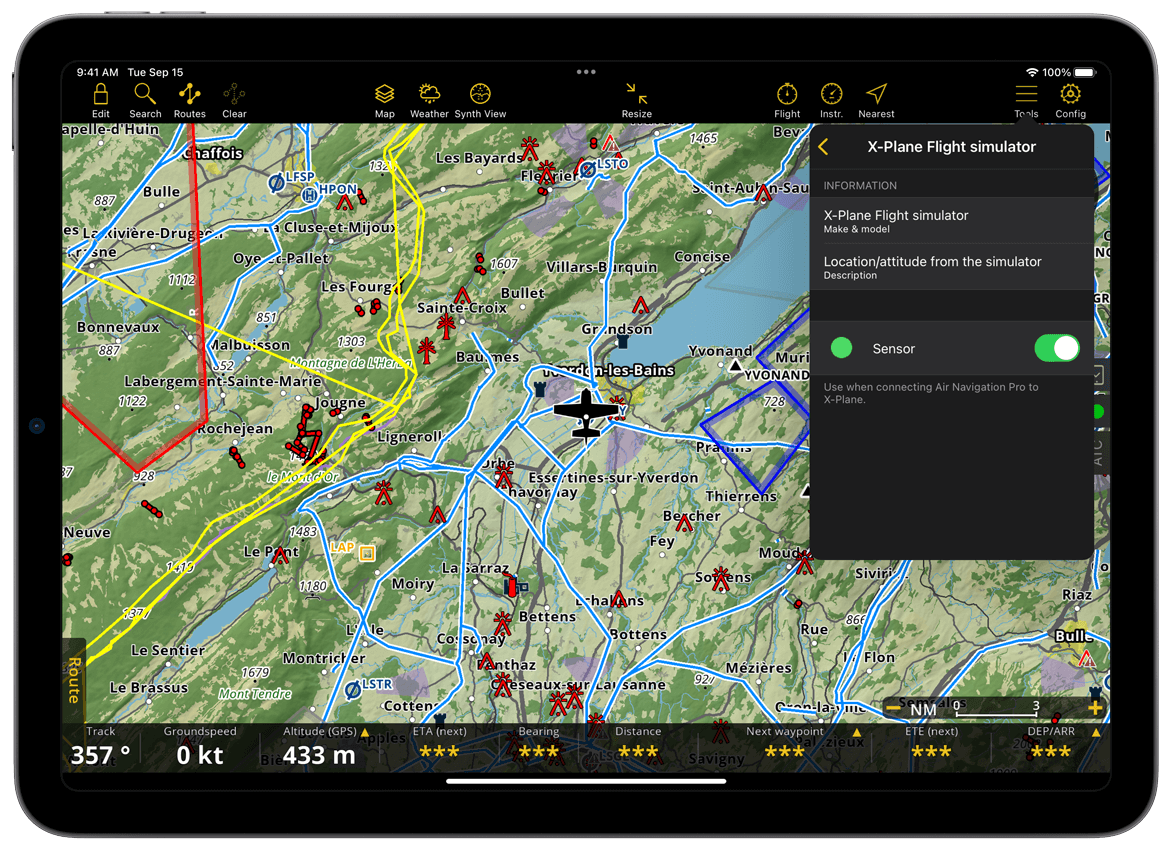
On the device in Air Navigation Pro, tap Tools > Sensors > X-Plane Flight simulator - enable the toggle button.
Assuming you have successfully installed and bridge to XMapsy, anything you have set will be reflected on the Air Navigation Pro on the moving map.
Connecting to X-Plane#
In order to connect Air Navigation Pro to the X-Plane Simulator, you should first check the system requirement here.
Once the requirements are satisfied, you can download the installer here: https://www.x-plane.com and follow on-screen instructions.
Note
Internet connection is needed when connecting the Air Navigation Pro to the X-Plane 11
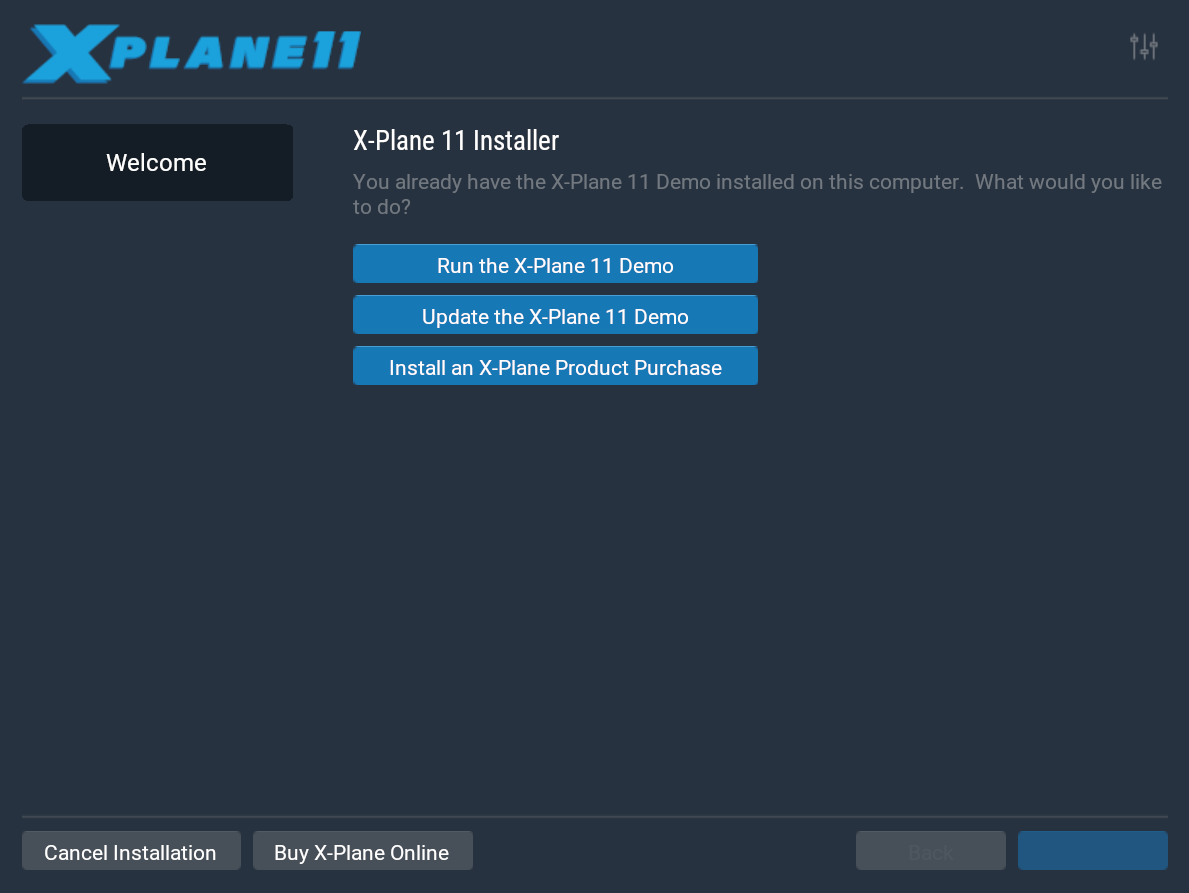
Launch the X-Plane application
Note
You can select either to use a X-Plane Demo (functionalities are limited and the usage) or Purchased a X-Plane (to use the full functionality).
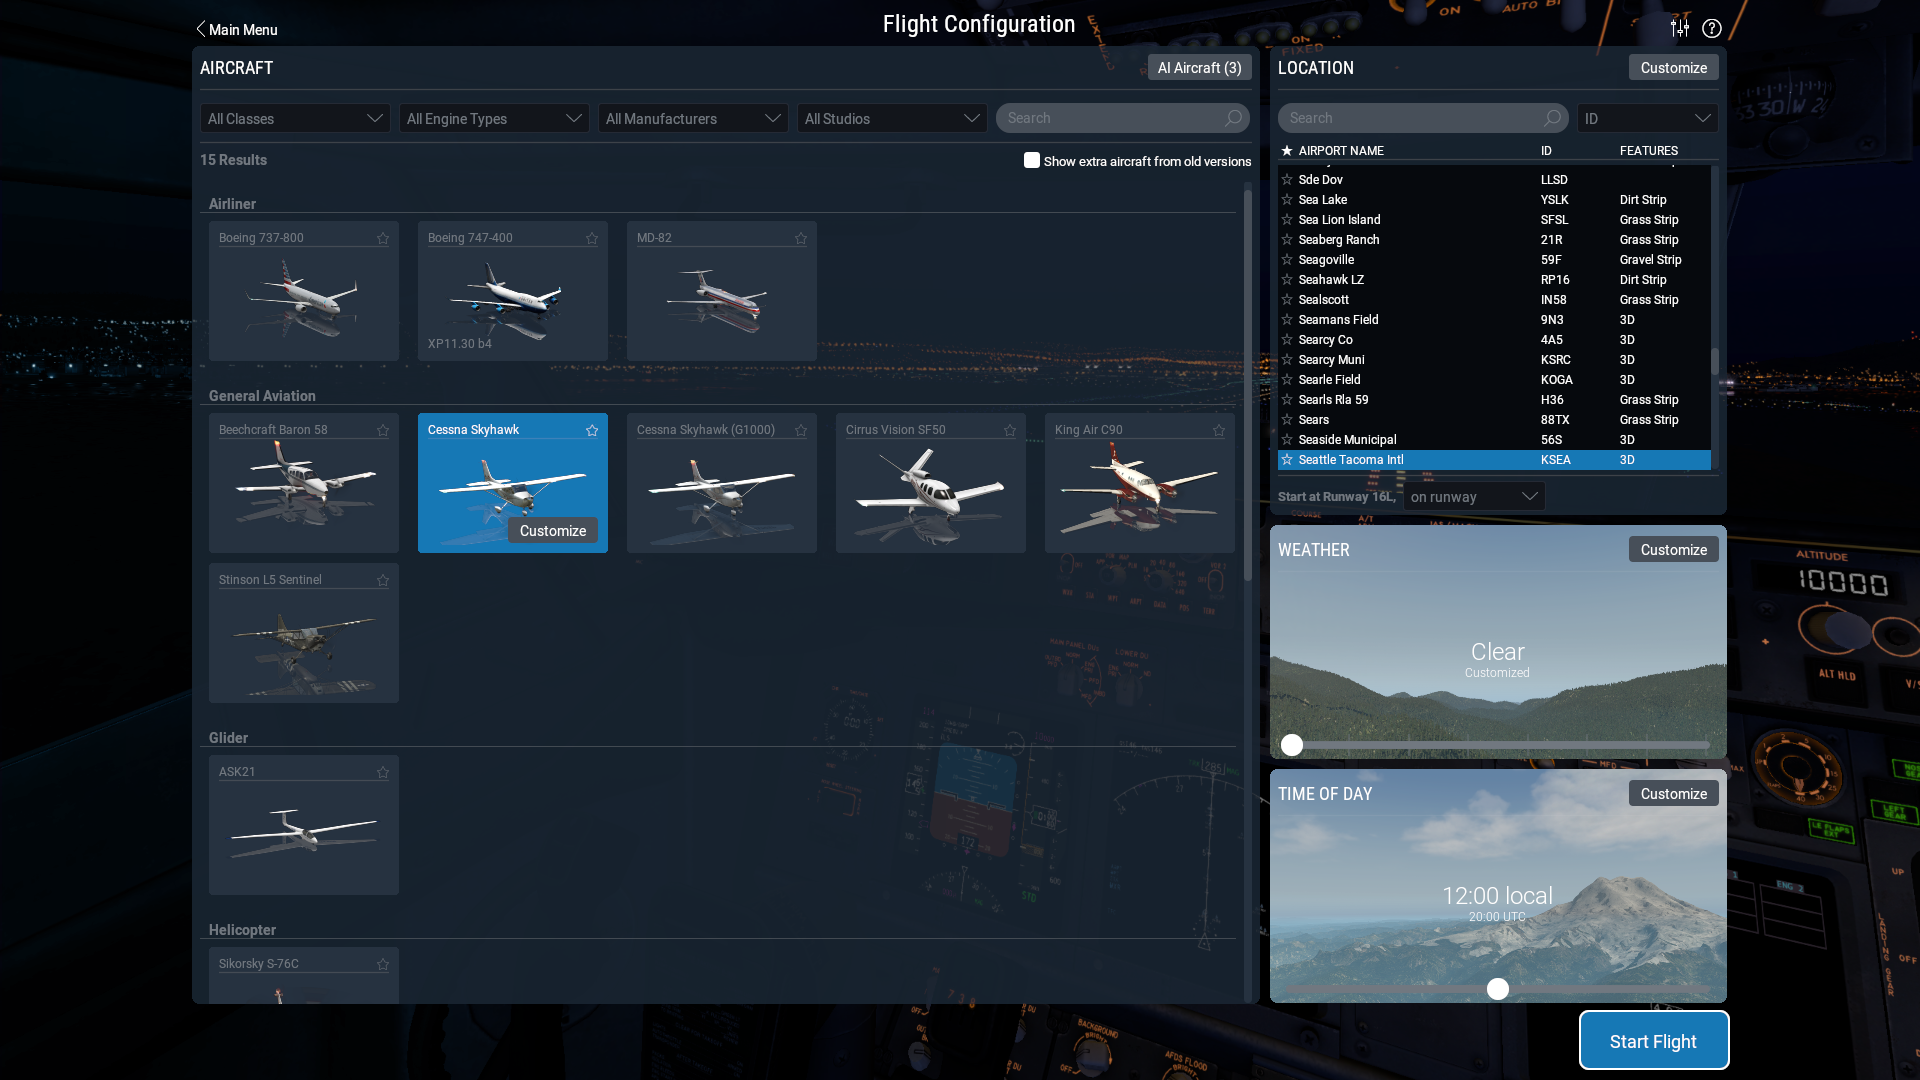
Select new Flight

Select desired configuration of the flight, such as: Aircraft (Class, Engine, Manufacture, etc.), Airport Name (departure area), Weather, Time of Day
At the upper right - click the Settings icon.
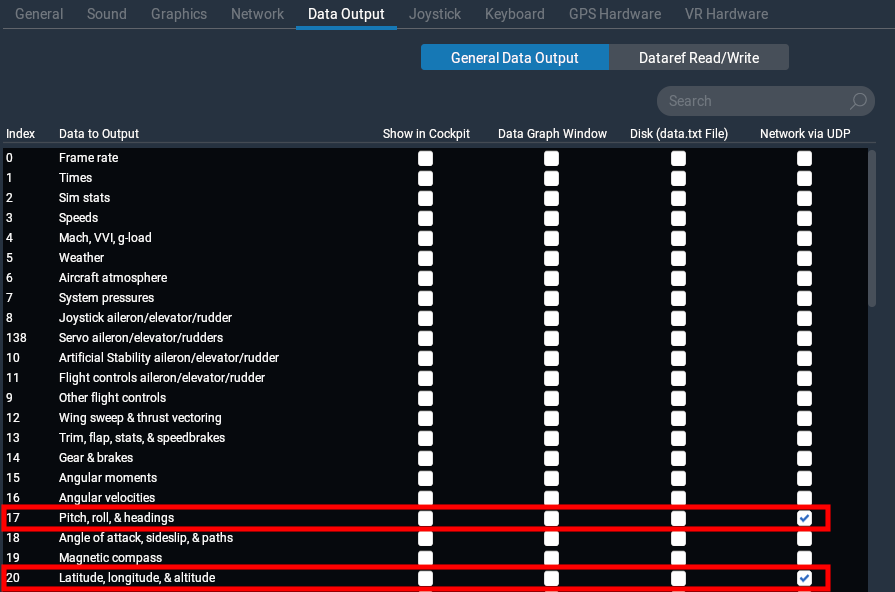
In Data Output - enabled the Network via UDP of Pitch, roll, & headings and Latitude, longitude, & altitude.
Note
There is a limitation that 1 only app instance can reliably connect to X-Plane at a time.
In the Network setting - in “This machine’s role” > iPhone, iPad, and EXTERNAL APP - enabled the Broadcast to all mapping apps on the network.
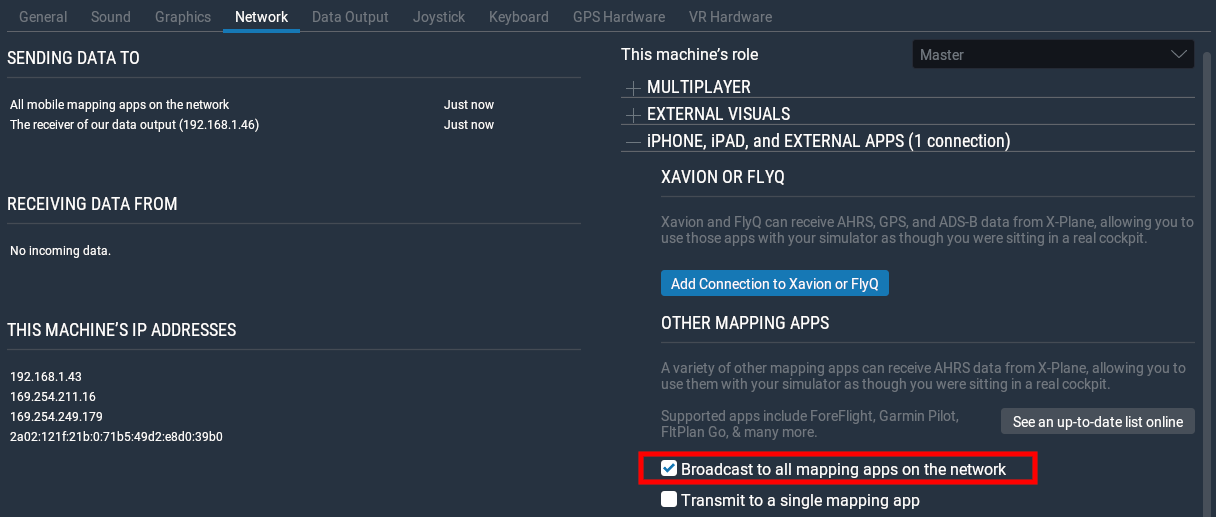
Select Start Flight
On iPad/iPhone launch the Air Navigation Pro
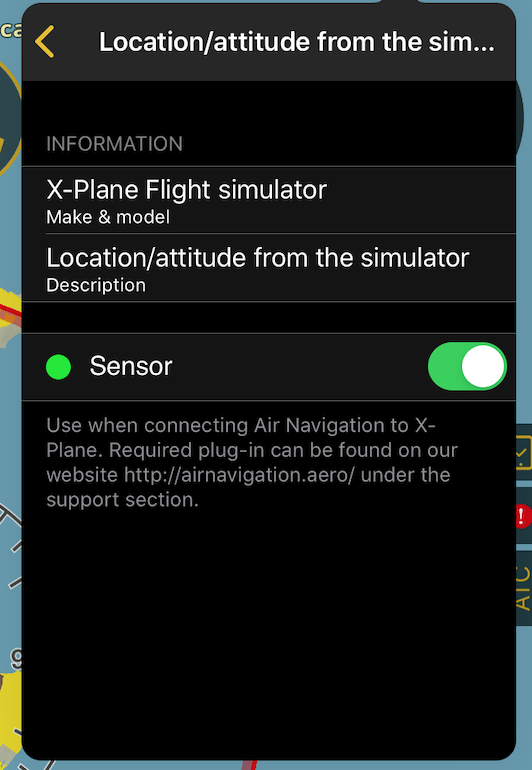
On the Tablet Menu Bar, tap Tools > Sensors > X-Plane Flight simulator - enable the toggle button
Note
Green dot on the sensor indicator is successfully connected otherwise it is not connected.
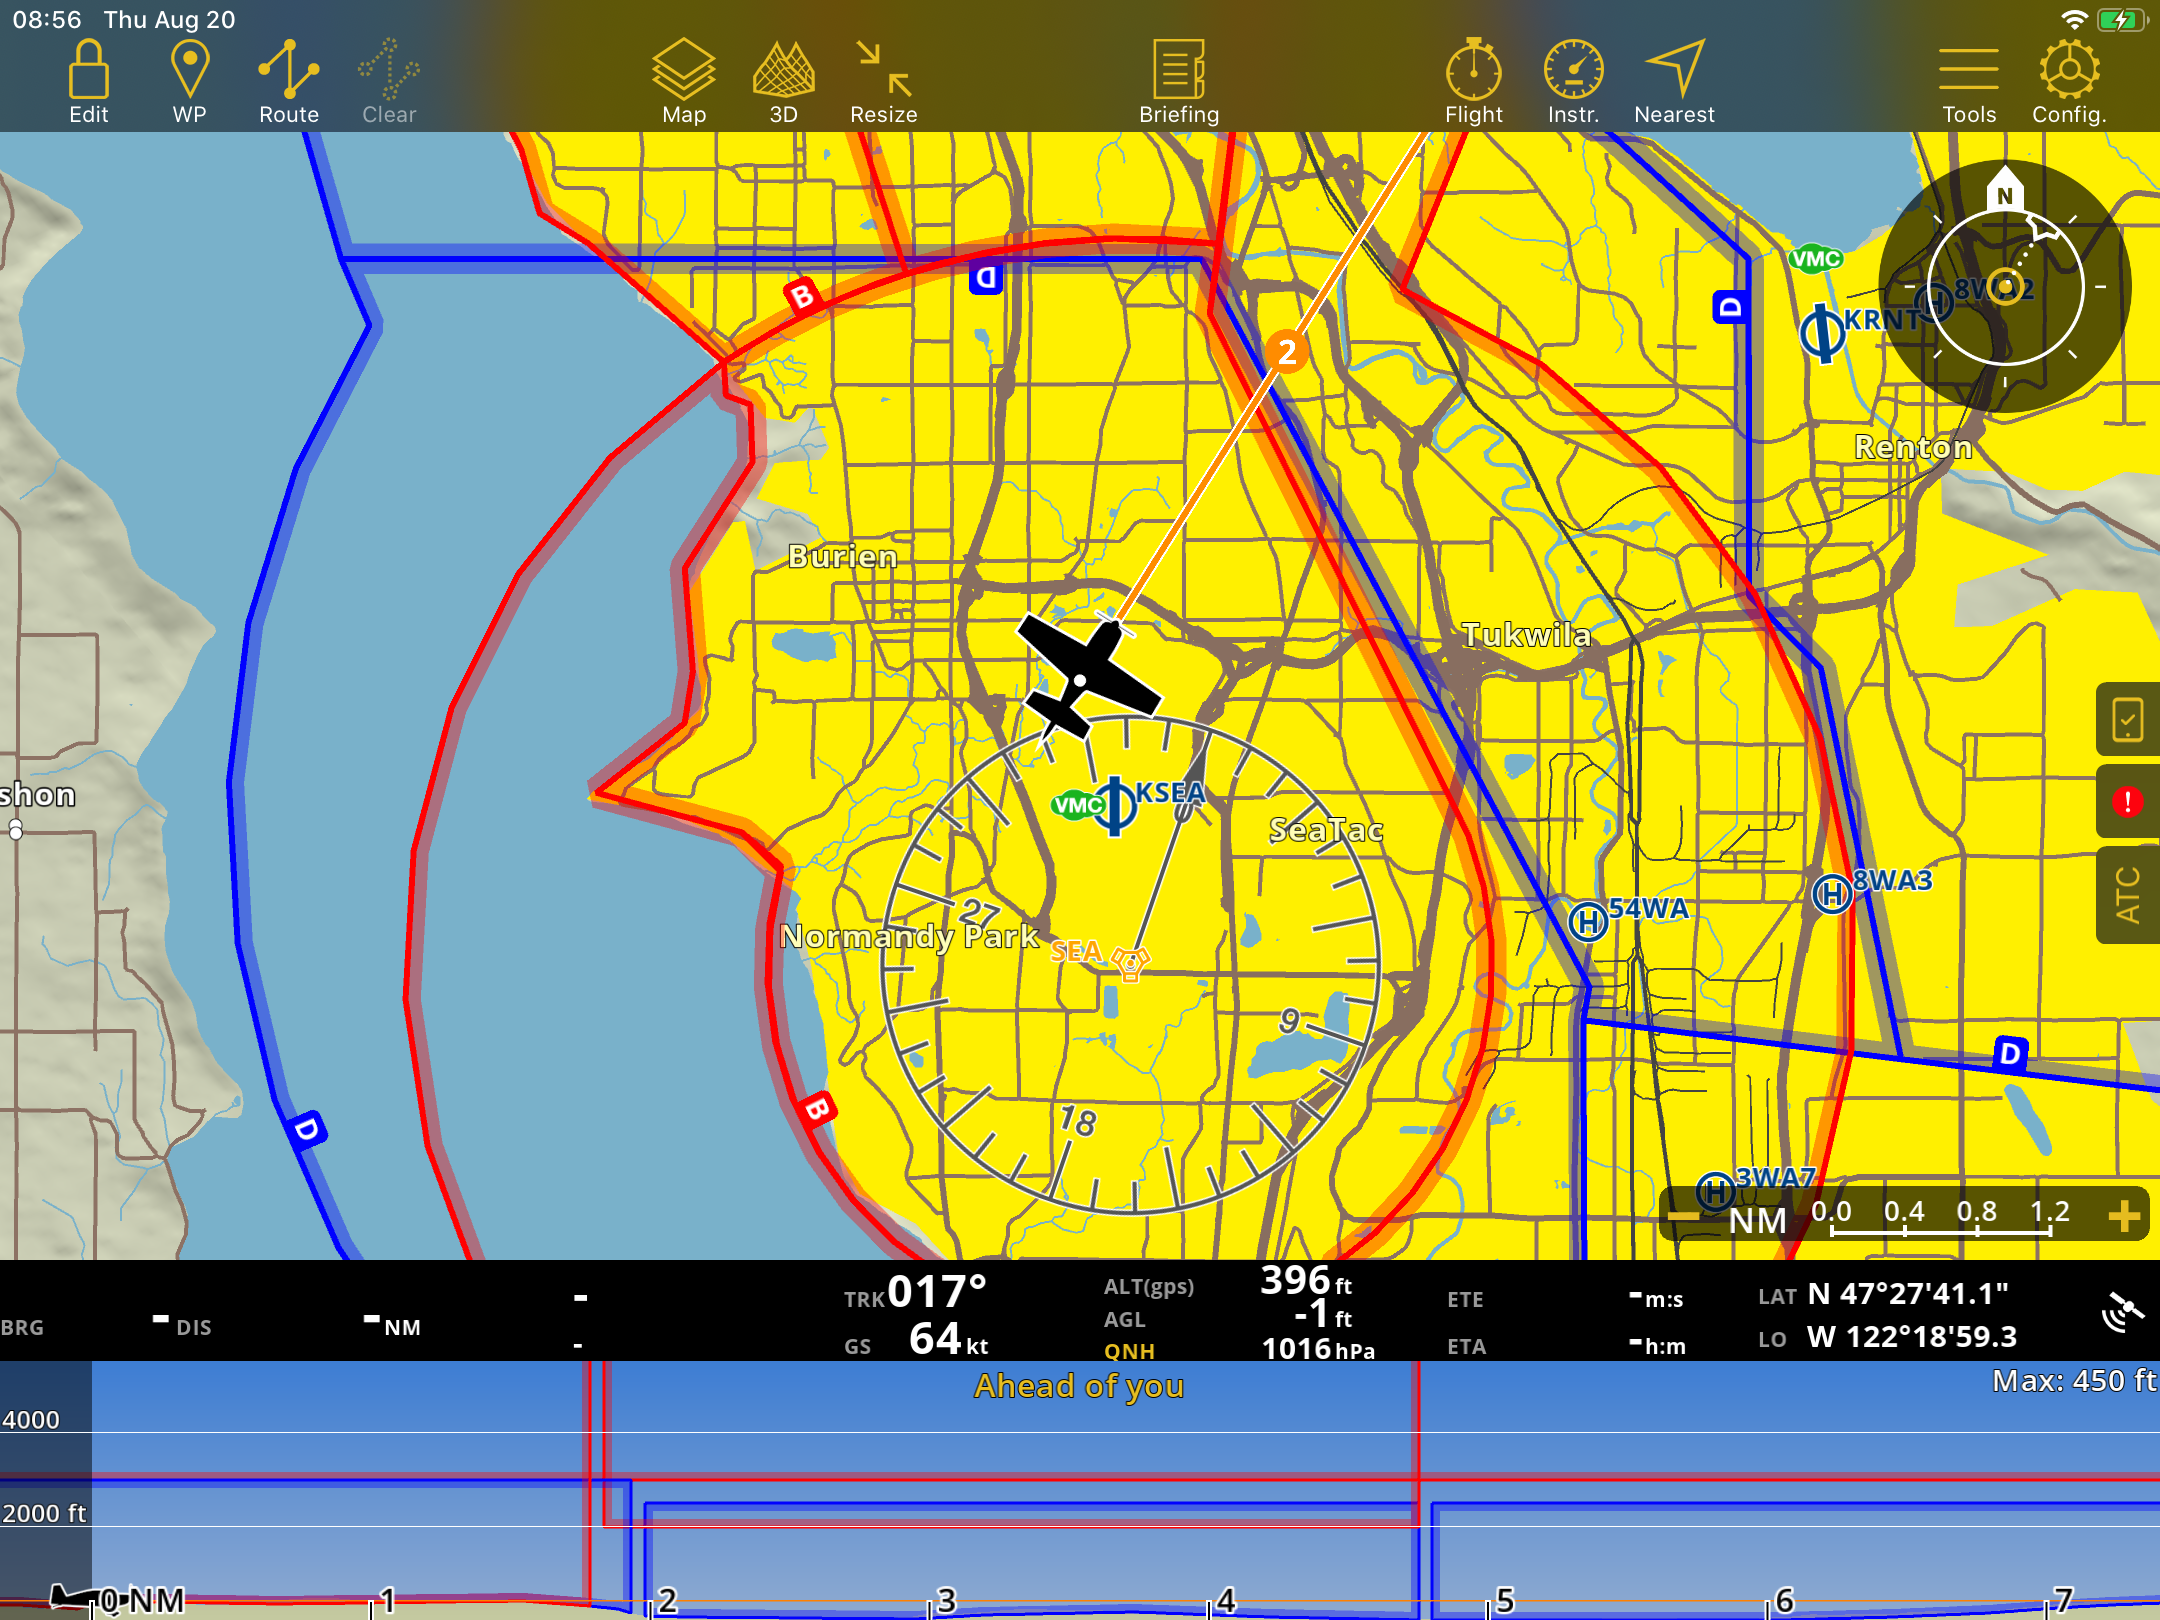
Use the controls in your computer to navigate the aircraft this also reflects the movement on Air Navigation Pro in your iPad/iPhone.
Connecting to Lockheed Martin Prepar3D#
Air Navigation Pro has the possibility of using all its features with Lockheed Martin Prepar3D.
In order to do this, follow these steps:
Make sure to save the “Acceleration” pack installed with FSX (or instead the SP1 and SP2, that you can get from the internet).
Download and install the plugin from here
Note
If having issues while installing it, run the icon as “Administrator” (right-click on it)
Download and install “Bonjour” application: http://support.apple.com/kb/DL999
Make sure to have both PC and iPad/iPhone connected to the same wifi network.
Run FSX and accept the messages that will be shown related to the plugin.
Run Air Navigation Pro on your iPad/iPhone and make sure to ONLY have the “Lockheed Martin Prepar3D” sensor in “Tools” menu (disable all the others, including “iOS Location Services”).
Start a flight in FSX and press the “ALT” key , then look for the “Add-ons” menu on the top bar and Start Air Navigation bridge.
Note
Make sure to have no Firewalls blocking the connection.
Troubleshooting#
Please, check if you have a “AirnavBridgeFSX.dll” file in the \AirnvBridgeFSX directory within your P3D / FSX directory structure
Check if the installer succeeded in modifying the DLL.XML (located in c:Users<Your Name>AppdataRoamingLockheed MartinPrepar3D v2). In any case, edit the DLL.XML to check if this section actually exists:
<Launch.Addon>
  <Name>Air Nav Bridge FSX</Name>
  <Disabled>False</Disabled>
  <Path>AirnavBridgeFSX\AirnavBridgeFSX.dll</Path>
</Launch.Addon>
If not, correct/edit DLL.XML to reflect.
Note
There might also be a simple mistake such as an error in a line of the DLL file. Example: Instead of having “Air Nav”, you read “Air Mav”.
Still having issues:#
If you notice a mistake in the file name given on the FSX error message, for example reading “AirmavBridgeFSX…”, with an “m” instead of an “n”, you should try doing the following: Rename ALL the files related to the FSX Air Nav Pro plugin with the same mistake (put an “m” and remove the “n”). For example: if you have AirnavBridgeFSX.dll, rename the file to AirmavBridgeFSX.dll
Try removing this key from registry: [HKEY_CURRENT_USERSoftwareMicrosoftWindowsNTCurrentVersionAppCompatFlagsLayers] “C:\Program Files(x86)\Microsoft Games\Microsoft Flight Simulator X\fsx.exe”=”$IgnoreFreeLibrary<AirnavbridgeFSX.d